Adding Files
Various types of files can be uploaded to the course website (PDF, Word, Excel, PowerPoint and more).
What's in the tutorial:
Adding files to the course website
1. Enable "Edit mode" on the upper right corner of the page.


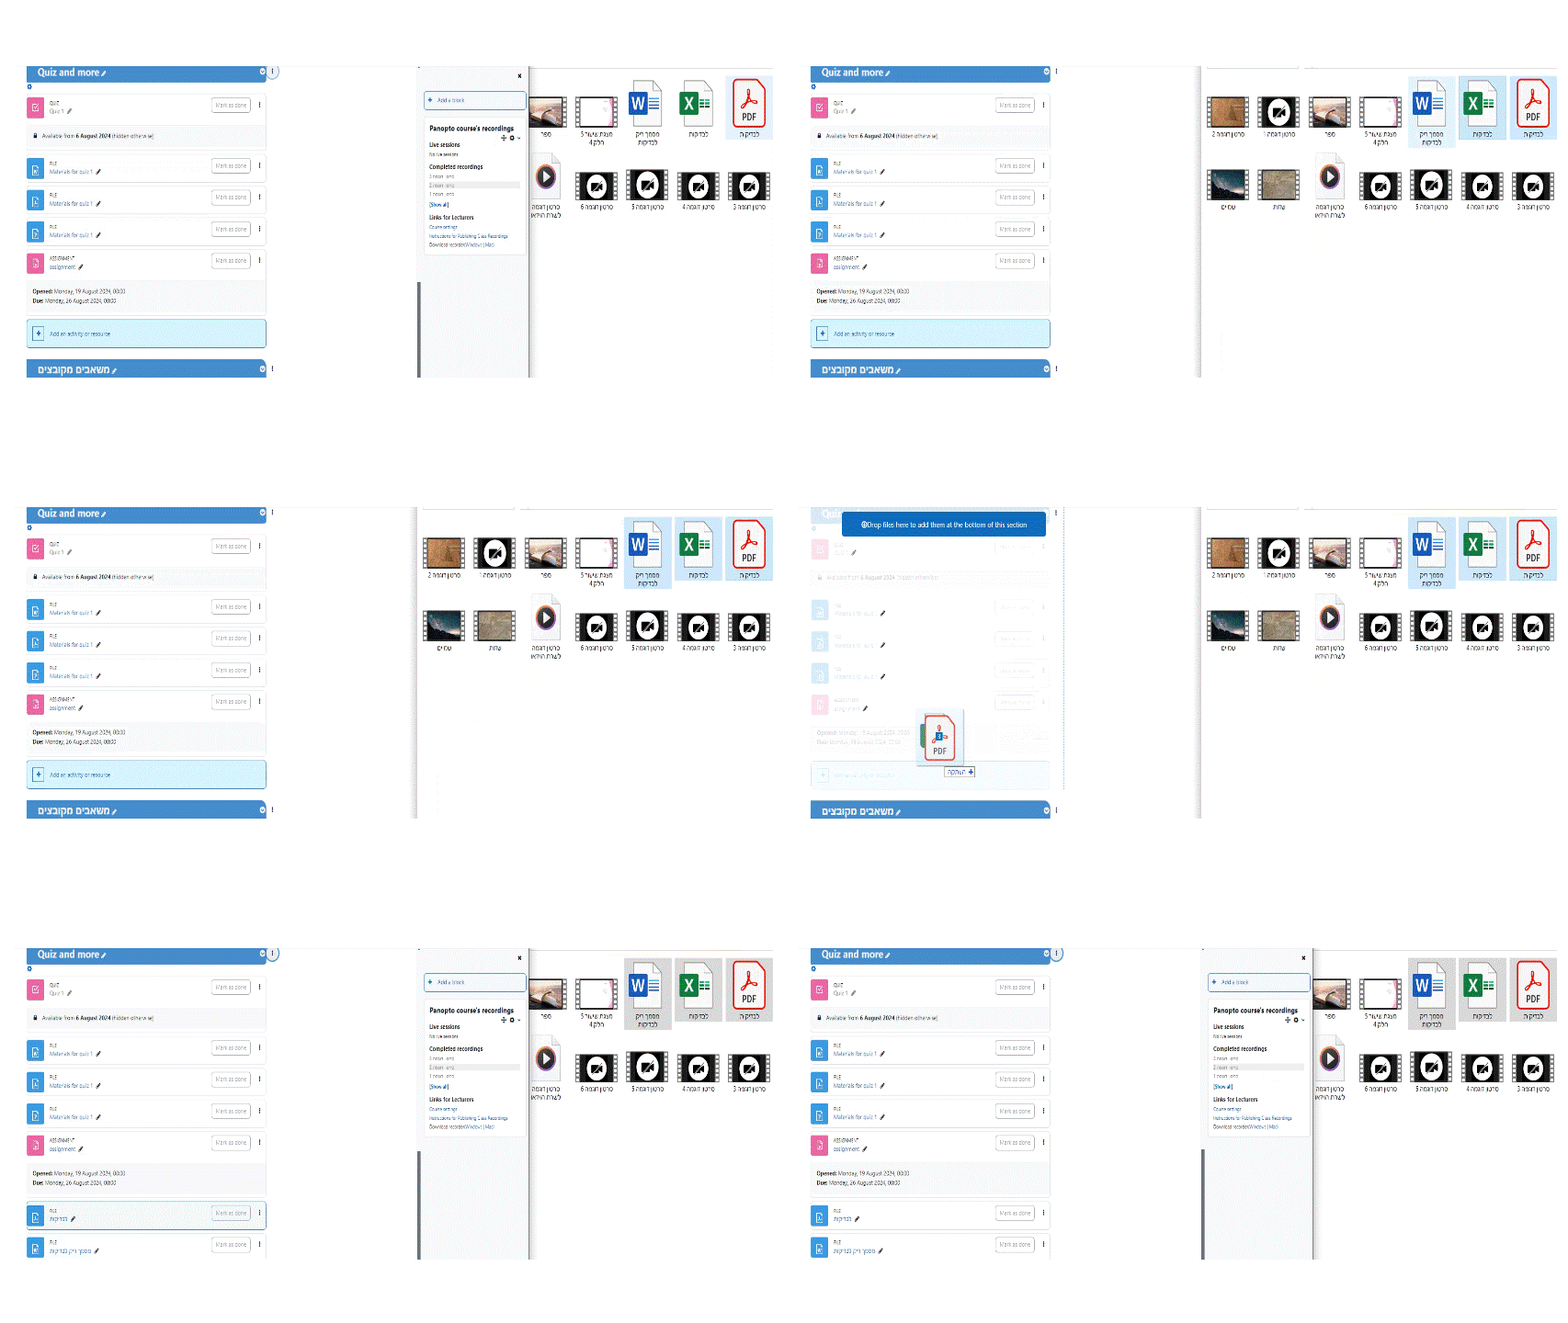
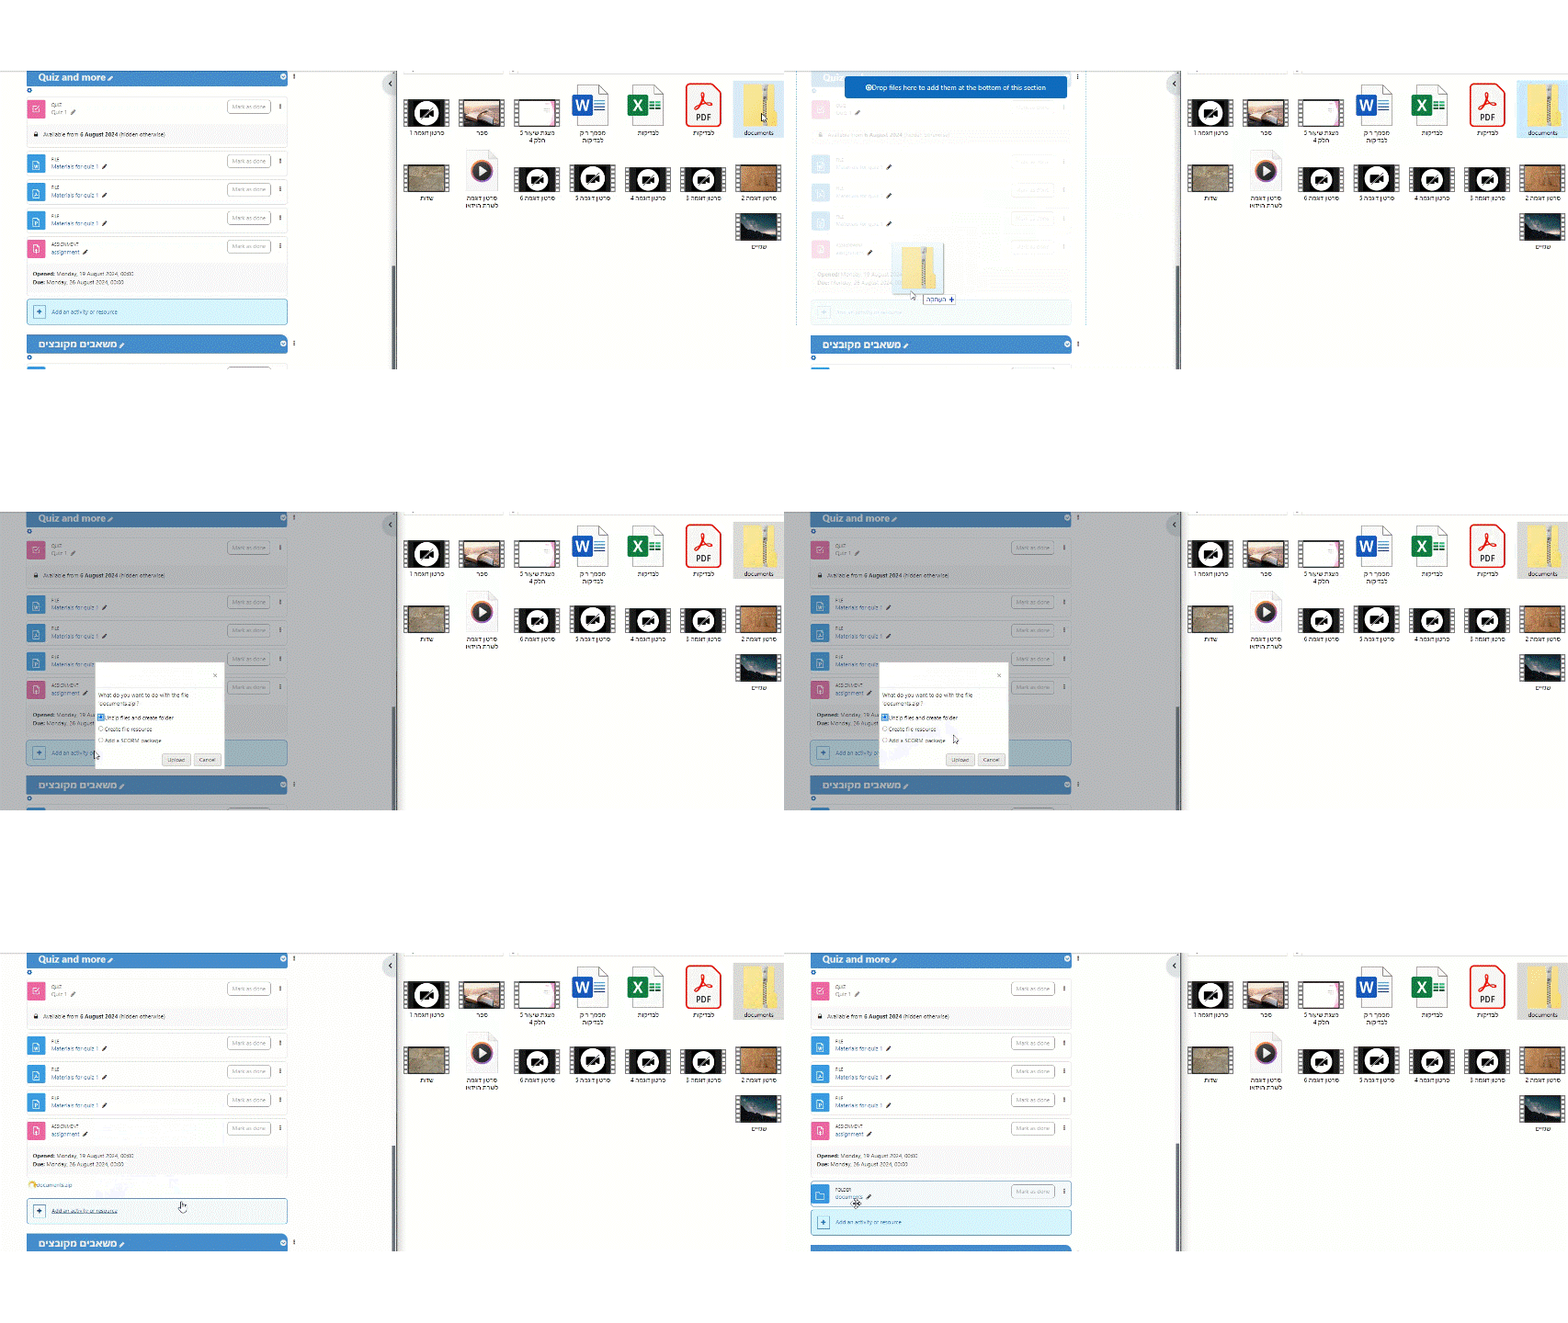
2. Select the relevant file(s), drag it/them from the computer folder to the designated topic on the course website, and release the mouse when "+Drop files here to add them at the bottom of this section" appears.

Dragging one file:

Dragging multiple files:

You can add several files together, of different types (including ZIP) to the course website.

3. To change the file name, click on the "pencil" icon and then click Enter to save.


Creating a folder
There is an option to create a folder files that will be available to the lecturer and students.
1. Turn on Edit mode
3. Choose “Folder”
2. Select a topic, click on then select "Activity or resource".


4. Write the Name of the folder and add instructions or a description of the files in the "Description" field.
5. Mark "V" in "Display description on course page" so that the instruction will be displayed on the main page of the course.

6. Drag the desired files to the drag-and-drop box. An unlimited number of files can be uploaded, but a folder cannot be uploaded.

Marking "V" in "Allow students to add files and edit the folder" is optional and also allows students to manage the folder: add files to it and edit files they have uploaded.
7. To finish and view the content, click on "Save and display".
8. If the students were given the option to add files, they can enter the folder on the course website and add files by clicking the "Edit" button.
