Assignment
The "Assignment" activity allows students to submit files on the course website. The lecturer and the teaching staff can grade and add feedback on the submission. Each student sees only his submission and feedback.
What's in this guide:
To read the guide for checking and grading assignments, as well as returning the grades to the students, click here.
Creating an Assignment activity
1. Turn on Edit mode
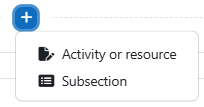
2. Choose a topic, click on and choose “Activity or resource”
3. Choose “Assignment”

4. In the "Assignment name" field, write the name of the assignment.
5. In the “Description” and "Activity instructions" fields, it is possible to type in relevant remarks or instructions for the activity.

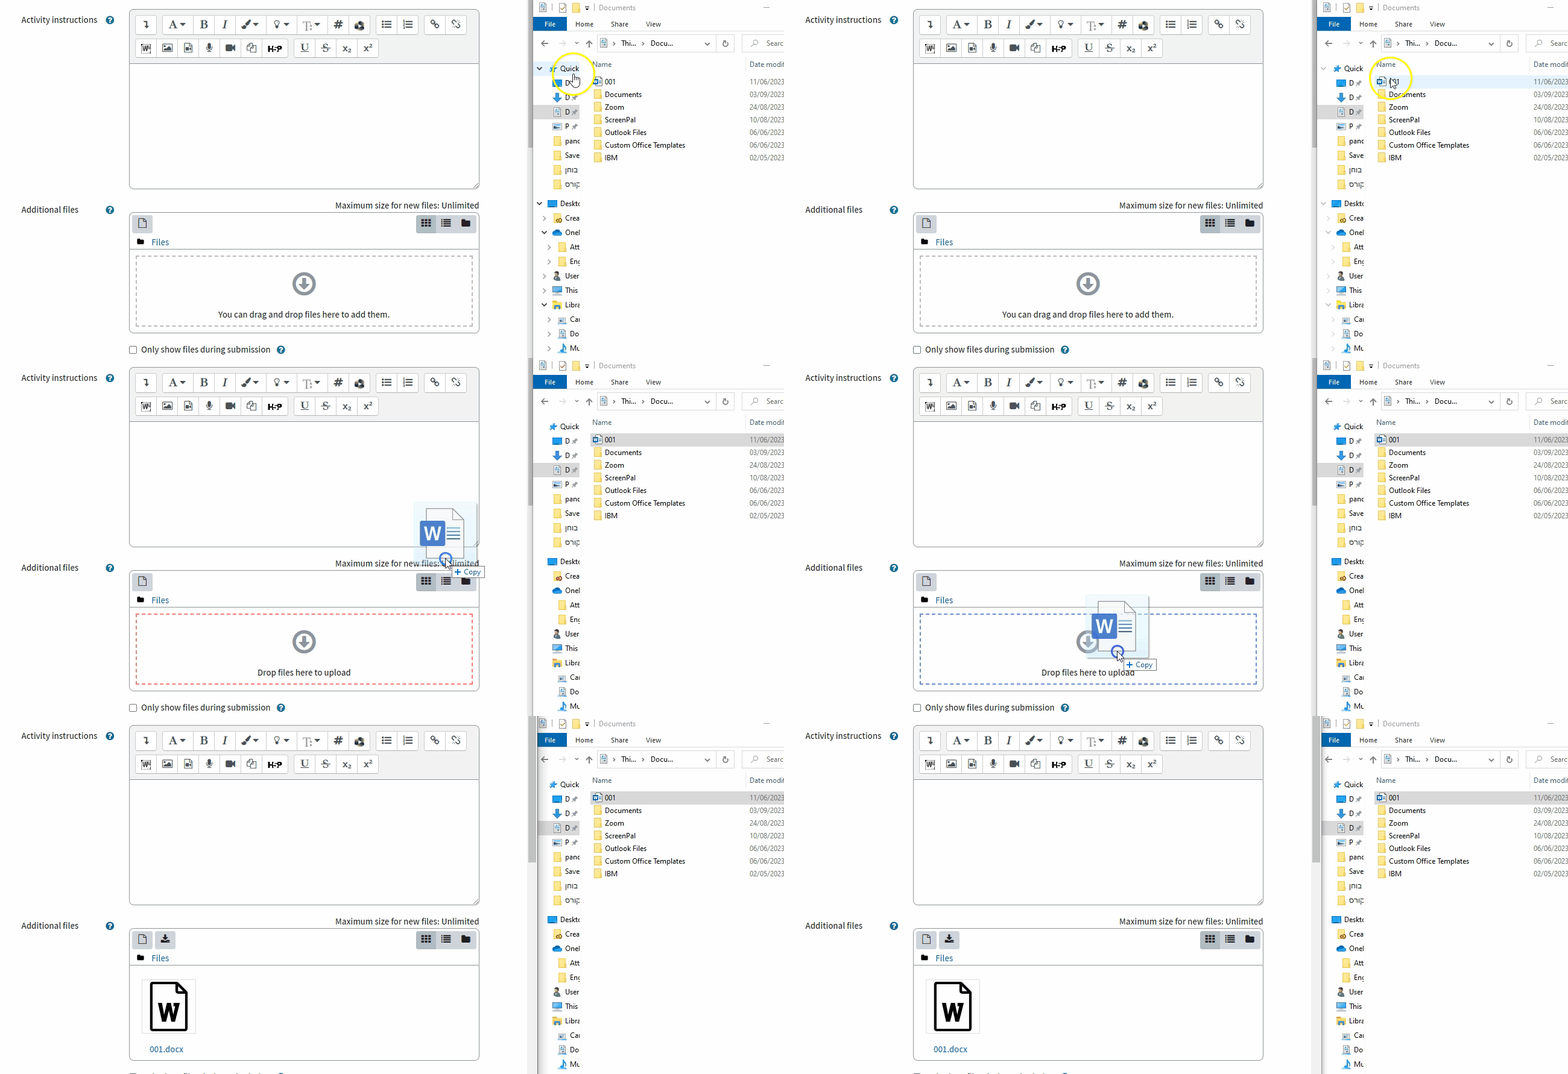
6. In the "Additional files" field, you can attach files related to the assignment activity (for example: questions page, submission template, etc.)

7. There are two ways to attach a file to an assignment:
Option A - Dragging from a folder in your computer:

Option B - Clicking on the arrow in the middle of the "Additional files" field.

In the window that opens, click on "Choose File", then select the desired file. To finish, click on "Upload this file".

Assignment settings options
Availability
1. "Allow submissions from" - from what date a student can upload a file for submission
It is necessary to mark V next to "Enable" and set the desired time.
2. "Due date" – the deadline for submission (students see this date in the assignment instructions).
3. "Cut-off date" – from what date it will no longer be possible to submit (students do not see
the date).
4. "Send a reminder message to lecturer by" – sends a reminder to the lecturer about grading submissions.

Day
Month
Year
Hour
Minute
If the "Cut-off date" is not set, students will be able to submit late. Both you and they will receive an indication of the actual date of submission and how many days late it was submitted.
5. "Time limit" – When checked, you can limit the time for submitting the assignment after opening the assignment page and instructions. This is useful for a home exam, for example, that the students receive the instructions for the test within the assignment and have limited time to submit it.
6. "Lock submission when the time limit passes" - from what date it will no longer be possible to submit (students do not see the date), available if "Time limit" is enabled.
7. "Always show description" – When checked, the "Description" and files added will be available to students as long as the assignment is available.

Submission types
1. You can define what students will submit in the "Submission types" section:
-
File submissions – An external file that is uploaded to Moodle.
-
Online text – Students can write a text submission in Moodle.

2. In order to limit how many files the students will be able to submit, select the number in the "Maximum number of uploaded files" box.

3. If you want to determine the type of files to be submitted (e.g. only Word or PDF files) you can set in the section "Accepted file types" by writing the file type in the text box or clicking "Choose".

4. After clicking "Choose", you can choose from the different types supported by Moodle in the window that opens, then click "Save changes".

Grades
1. You can set the assignment to "None", "Scale" (Pass/Fail, Submitted/Not Submitted) or "Point" (default option). By choosing this option you can set a "maximum grade" for the assignment (the default is 100).

2. To set up anonymous submissions, in the "Anonymous submissions" field, check "Yes" so that graders cannot know the identity of the students.

In Anonymous submissions, after grading students' identities must be disclosed so that they can see their grade and feedback.
Click here for more instructions.
Access restriction
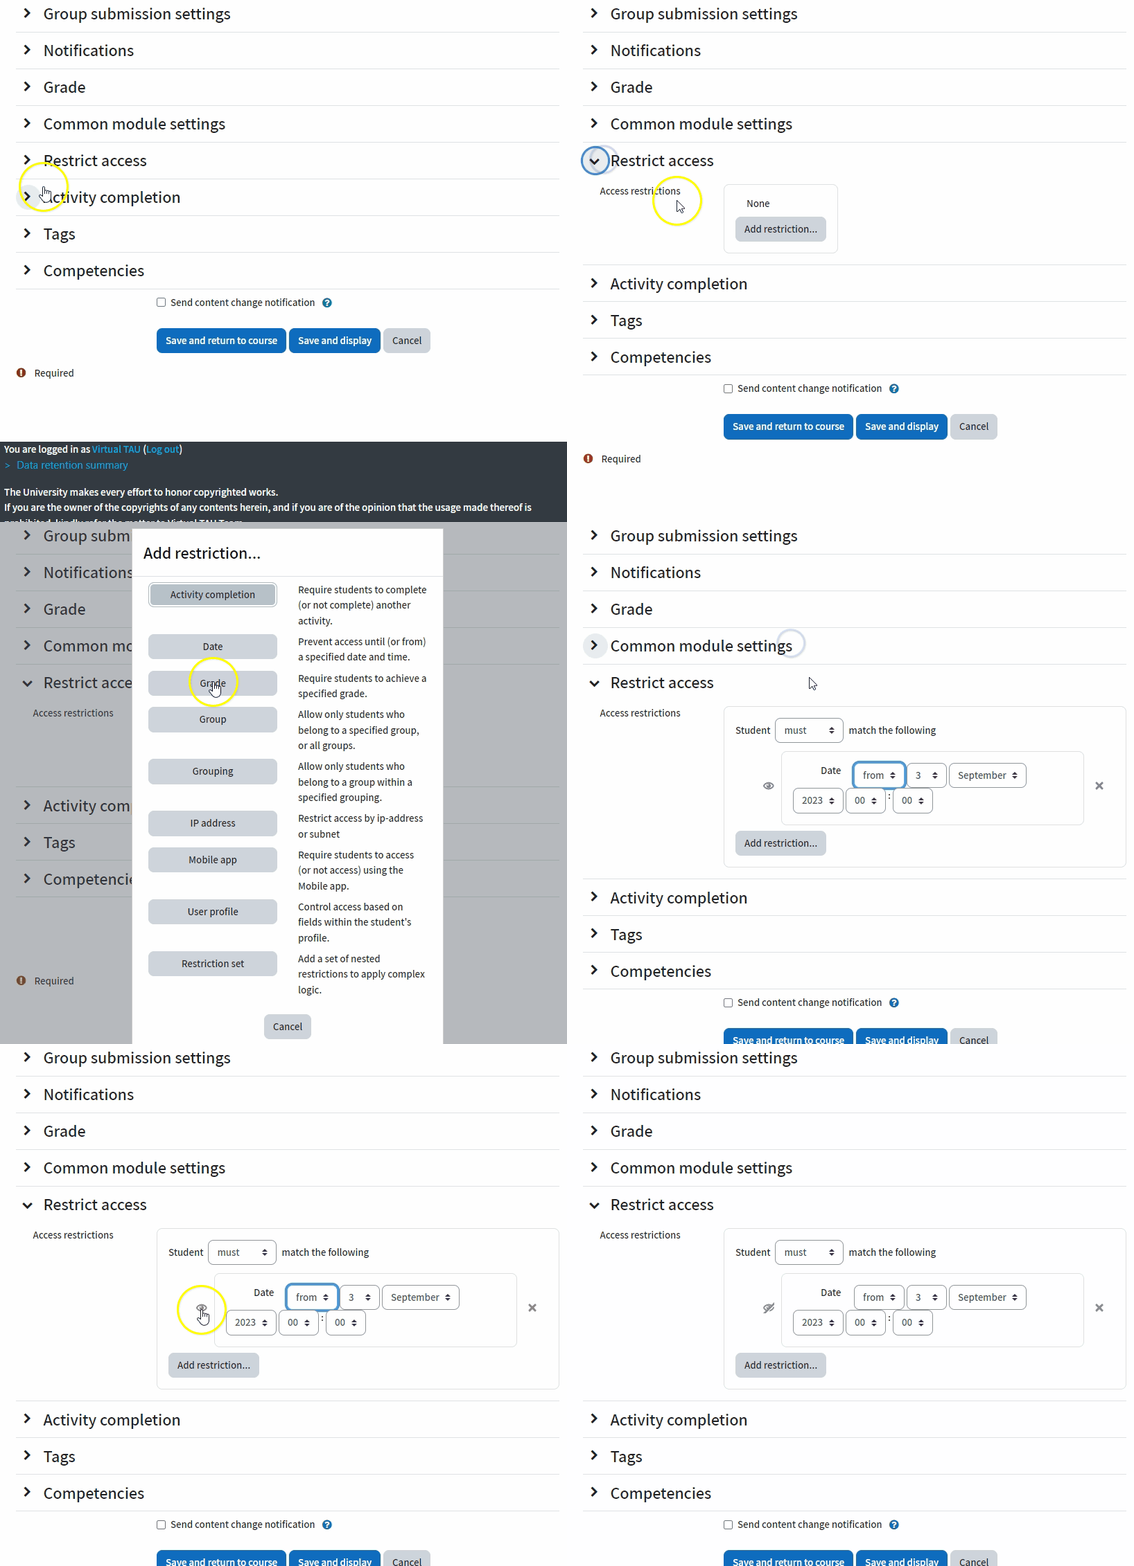
You can hide the assignment until a certain date in the "Restrict access" section.
1. Click on "Add Restriction".
2. In the window that opens, choose "Date".
3. Set the date when the assignment becomes available.
Open eye: Students see that there is an activity but you can't open it.
Closed eye: Students will not see the activity.

4. To finish, click on the "Save and return to course" button at the bottom of the page.
There is no indication of the time of student's entry into the activity until the assignment is submitted. It is possible to document the student's entry into this component by activating the "Honor Code Declaration" and selecting the "None" option.
In this situation, a record is created of the student's entry into the exam/assignment component even without actually signing the declaration.
Click here to go to the guide for adding Honor Code Declaration
Enabling group submissions
The "assignment in groups" activity allows students to submit files on the course website in predefined groups.
-
The lecturer can give a grade and feedback to the entire group.
-
Each student sees the submission and feedback of his group only.
Before starting, the submission settings must be defined in groups, before the assignment submission date. Once students have started submitting (even if in "Draft" mode), it will not be possible to set it.
Dividing students into groups
The students in the course can be divided into groups in several ways.
Click on the link to read the instructions:
-
Group choice activity: The students choose which group/s to join through the activity.
-
Groups created by the lecturer: The lecturer can divide the students into groups on the course website.
-
Random division into groups : The lecturer can create groups with random participants and set the number of groups or number of students in each group.
Adjusting the settings for group submission
1. In the "Assignment" settings, go to the "Group submission settings" section
If you already created the assignment, click on it and then on "Settings" in the management menu on the right

2. Set the "Yes" option in the "Students submit in groups" section

3. Leave the option "No" in the "Require all group members to submit" section so that not all group members are required to submit their assignment files separately

The file will automatically appear with all group members and each of them will receive the grade and feedback, even though they will be given separately.
4. In "Grouping for student groups", select the grouping that will be used in the assignment.
Click here for instructions on creating a "Grouping"

5. Click on "Save and display" to finish and view the content
6. After the students' submissions, click on "View all submission"
7. In the next page, it shows the list of students, to which group they belong and assignment file that belongs to all members of the group
Student
Group
Assignment

Checking assignments on Moodle
Assignments can be checked and reviewed by teachers directly through Moodle (without downloading the files to your personal computer). This way, each student sees only their own feedback and grades. Grades updated in the assignment are automatically reflected in the course grade report.
1. On the main page of the course site, access the relevant assignment.
2. In the "Grading summary" page, click on "Grade".

3. In the window that opens, you will find the student’s submission file in the center of the screen.
Scroll between assignments

Scroll between assignment pages
Student details
Student submission
Submission details
The grading and feedback window on the right, underneath the submission details, includes the following:
Submission comments
Grade
Teacher's feedback comments
Teacher's feedback in a separate file
Student's submission attempts

In the middle of the screen, above the student's submission, there is an annotations toolbar for markings, comments, and feedback:
{
Rotate assignment 90 degrees to the right or left
{
Add boxed comments - regular or in color
{
{
Drag
Select
{
Pen
{
Shapes
{
Highlight text
{
Stamp
Downloading assignments to personal computer
When students submit a file through the "Assignment" component, it is possible to download all submission files at once, review them, and add comments directly on the files.
After completing the review, the files can be uploaded back to the assignment in one batch, so that each file is delivered directly and only to the submitting student. Each student receives only their own feedback file.
1. Create a folder on your computer for student submissions for the assignment. Then, enter the relevant assignment on the course site in Moodle.

2. In the assignment page, click the button "View All Submissions".

3. In the "Submissions" screen that opens, tick the box under "Select" to select all submissions.

4. A white stripe will then appear at the bottom of the screen. Click on "Download".
5. Click on your browser's "Downloads" button ( ), locate your downloaded ZIP file, then click on the "Show in folder" icon ( ).

6. Right-click on the ZIP file, select "Extract All...", browse the folder you created for your student submissions, and click "Extract".


It’s important to keep the original file names as they were downloaded to your computer, since they include encoding that enables uploading all the files at once—each to its respective student—after the review.
7. Once the files have been extracted, each assignment can be checked and commented on.

Making the students anonymous when checking an assignment
Hiding the students' names in an Assignment in Moodle allows you to check the submissions anonymously. It is important to ask the students not to specify personal details in the name of the file or in the content of the submission, in order to maintain the anonymity.
After finishing checking the assignments, the names of the students are revealed and the checked assignments, the grades, and the feedback are published.
1. Enter the Assignment and then click on "Settings" in the top menu.

2. In the "Grade" section, check "Yes" in the "Anonymous submissions" dropdown menu, and click on "Save and display" to finish.


This option can only be set before the students' submissions.
Once there are submissions, it will not be possible to change it.
3. Click on "View all submissions" in the Assignment page to view the data of the submissions.
Each student was given a random number without identifying details.

To read the guide for making students' names visible again before returning assignments, click here.