Database
The Database activity is a collaborative task, promoting the creation and display of a shared database between the instructor and students.
Once the instructor creates the database, students can view entries uploaded by others and upload their own data. They can also write comments on items added to the database—either their own or those of other students.
Pedagogical Uses
Collaborative Knowledge Base
-
Students upload and view content in the shared knowledge base.
-
Typical content includes articles, images, and links to websites relevant to the course.
Process-Based Learning Evaluation
-
The instructor creates multiple databases, according to learning areas or stages.
-
Feedback is provided for each stage separately, including the final stage.
Portfolio
Students present their work and include a description for each item.
Peer Assessment
-
Students upload content to the database and receive feedback from other students and the instructor.
-
Evaluation is done through feedback in the comment section.
Creating a Database activity
1. Turn on Edit mode
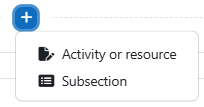
2. Choose a topic, click on and choose “Activity or resource”
3. Choose “Database”

4. In the "Name" field, assign the database a name.
5. In the “Description" field, add n relevant remarks or instructions for using the database.

6. In the "Entries" section, you can define settings for the entries added to the databass.

If marked "No", students can only see their own entries.
Instructor must approve every entry.
The number of entries a student must add before viewing other students' entries.
The maximum number of entries per student in this database.
7. In the "Availability" section, the instructor can set a specific length of time for students to add their entries, as well as make the database "Read-only".
Students can add entries to the database
Students can browse the database

{
{
7. In the "Ratings" section, the instructor chooses who can rate and how the rating will affect the grading for this activity.
To give permission for students to rate entries, the activity must first be saved.

If the ratings do factor into this activity's grade, the instructor can choose the type of aggregation:


The mean of all ratings
The highest rating becomes the final grade
All ratings are added together
The activity will not appear in the gradebook
The number of rated items is the final grade.
The smallest rating becomes the final grade
7. In the "Completion conditions" section, it is possible to assign a specific number of entries to be added for the activity to be considered as completed.

8. To finish, click on the "Save and return to course" button at the bottom of the page.
Defining and adding fields
1. To add fields to the database, click on "Create a field".


Checkboxes to select
Enter a geographic location using latitude and longitude
Enter a date
Checkboxes for the student to select
Enter any number
Enter simple unformatted text
Text entered in the options area, presented as a drop-down list to choose from
Upload and display an image file
A question with opposing buttons (Yes/No)
Enter a long piece of text using the text editor
Enter a URL address
2. For example, use "Short text" for the title:
-
Field name = "Research Proposal".
-
Field description = "Proposals for the final projects"
-
Required field = Choose whether students must enter information

3. Click on "Save" on the bottom right corner.

4. This is what the field looks like from a student's perspective:
Name of field

Description appears when hovering over the textbox
5. After saving, on the "Manage fields" page, fields can be added, edited, deleted, and sorted.


Adding entries to the database
Entries are templates created by the instructor, within which students (and the instructor) can add data. The item includes all the fields the instructor defined in the database.
It is recommended to create a sample item to demonstrate to students what is expected in the submission for the activity you created.
1. On the main page of the database, click on "Add entry".

2. Fill in the fields defined in the previous step. In this example, new fields were added - "Description" and "File":

3. This is what the entry form looks like from a student's perspective:
Description of research
File upload

Name of research
4. Click "Save".

Using the database as a student
In addition to adding entries, students can rate and comment on other entries.
1. When entering the database, each entry would look like this:

Click on and select "Show more".
2. Students can now view the entry and comment on it.

