Group Choice
This activity allows students to divide themselves into groups in Moodle.
Groups that the students choose are saved on the course website, so assignments and activities can be connected to them, for example: submitting assignments in a group, opening an activity for a specific group (such as a dedicated forum for the group, re-examination, etc.).
1. Turn on Edit mode
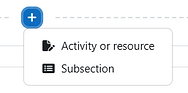
2. Choose a topic, click on and choose “Activity or resource”
3. Choose “Group Choice”.


4. Type in a name for the activity in the "Group choice name" field, for example "groups for assignment 1".

5. You can write in the "Description" field an explanation/description for dividing into groups.
6. In the "Miscellaneous settings" section, you can choose:
-
To allow students to enroll for several groups
-
If the students will be able to see who signed up for which group (the lecturer will always see the names)
-
To allow students to change their choice
-
If the students see the names of those who have not answered yet (it is recommended to keep it "No")

7. To limit the number of students who can register for groups, choose "Enable" in "Limit the number of members for each group". Otherwise, there is no limit to the number of students who can register for each group.

8. To limit the number of members in all groups, mark V in "Limiting number of participants for all groups" and then write the limit in the field "Maximum number of participants for all groups".

9. Groups: You can create new groups for this activity or choose groups from existing groups in the course.
Option A - Creating new groups for the activity:
-
Write a group name followed by # in the "Naming scheme" field. For example: "Group Choice #"
Each group will receive the typed name and a different number.
For example, if the "Naming scheme" is "Group Choice #", then the names of the groups will appear as follows: Group Choice 1, Group Choice 2, Group Choice 3... -
Define how many groups you want to be created in the "Number of groups" field.

Option B - Choosing groups from existing groups in the course.
In the "Available groups" panel, a list of the existing groupings in the course is displayed (marked with a triangle next to the name of the grouping) and all additional groups in the course.
-
To select all the groups in the grouping: select the desired grouping and click on the "Add Grouping" button.
-
To select a group/groups: select the desired group/groups and click on the "Add Group" button.
The selected groups with appear on the right panel.

Set a time period for the activity
1. If relevant, check the field "Restrict answering to this time period".
2. Define a time range for selecting the groups, in the "Open" and "Until" fields.

3. To finish, click on "Save and display".

Change number of students per group
1. Return to the "Settings" page and scroll to the "Groups" section.
2. Select the group you want to change the limit of the number of participants.
A box will open under the panel, where you can write down the new limit. You can see that the restriction has been updated next to the group name:

3. To finish, click on the button "Save changes and return to the course".
If there are X groups in a sequence and you would like to add additional groups in the same sequence in the field: "Naming scheme"
-
In the field "Naming scheme", type in the same name (with a # at the end)
-
In the field: "Number of groups", type in how many groups you would like to add
-
In the new field "The numbering of groups will start from" type in which number to continue from the sequence
For example:
if there are 3 groups: Group 001, Group 002, Group 003 and we want to add two more groups to this sequence, we will fill in the fields as follows:
-
in the "Naming scheme": Group #
-
in the "Number of groups" field: 2
-
in the field "The numbering of groups will start from": 4
After saving, two new groups will be created: Group 004 and Group 005.

See "Group Choice" division
A list of groups and their members will appear for everyone in the course, according to the activity settings. Lecturers can also export the list of groups and members to an Excel file.
1. Enter the "Group choice" activity on the main page of the course website.
2. The list of students will appear according to the groups they chose to insert into the content

3. Click on "View X responses" located on the upper left side, in order to export the list of groups to Excel.

4. On the next page, click on "Download in Excel format".
