Divide students into
random groups
This action allows to connect any activity on the course website (forum, assignment, test...) with a specific group of students.
Such a division can be a match to several situations:
1. One common activity for the entire course, to be carried out by separate groups.
2. One activity designed to be performed by only one group (out of all the participants).
What's in this tutorial:
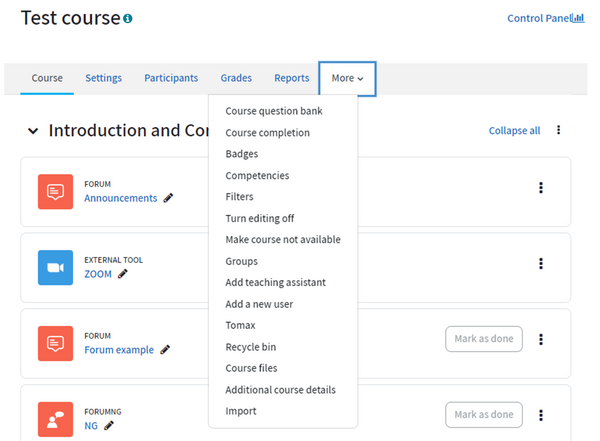
1. Enter the course website and click on "More" in the top menu and then on "Groups".
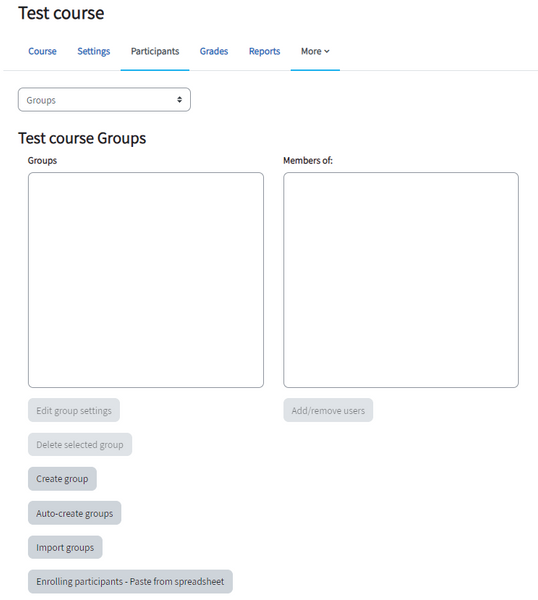
2. On the page that opens, click on the "Auto-create groups"
5. On the page that opens, in the "Naming scheme" field write a group name followed by a sign: # or @.
This way, each group will receive the group name and a different number (#) or letter (@).
For example, if you type in: "group #", the names of the groups will appear as follows:
"group 1", "group 2", and so on.
Alternatively, if you type in: "group @", each group will receive the letter representing the group, for example: "group A", "group B", and so on.

Random groups based on the number of groups
1. In "Auto create based on", select the option "Number of groups".

2. In the field "Group/member count", type in the desired number of groups.

3. In "Select members with role", choose "Student".
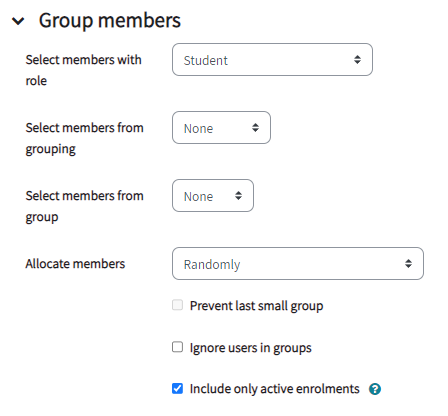
4. In "Allocate members" choose "Randomly".

5. In the section "Grouping", in the field "Grouping of auto-created groups", select the option "New grouping" from the dropdown menu.
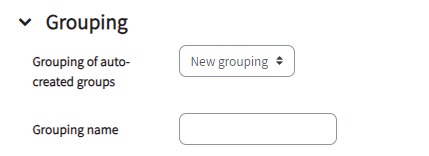
6. In the field "Grouping name", type in the new grouping name, for example "Assignment 1".

7. To finish, click on "Submit" at the bottom of the page.
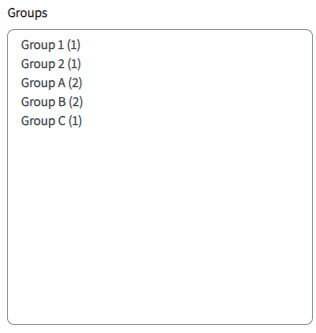
8. In the page that opens, you can see the randomly created groups.
In parentheses - the number of students in each group.
Random groups based on the number of participants in the group
1. In "Auto create based on", select the option "Members per group".
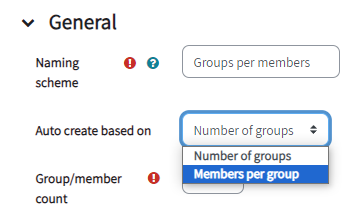
2. in the field "Group/member count", type in the number of students that will be in each group.
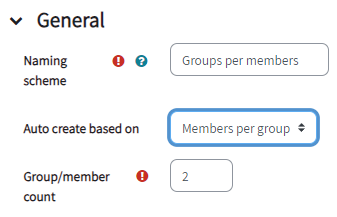
3. In "Select members with role", choose "Student".

4. In "Allocate members" choose "Randomly".

5. In the section "Grouping", in the field "Grouping of auto-created groups", select the option "New grouping" from the dropdown menu.

6. In the field "Grouping name", type the grouping name, for example "Assignment 1".

7. Click on "Submit" at the bottom of the page
8. In the page that opens, you can see the randomly created groups.
In parentheses - the number of students in each group.
