Attendance Management
Class attendance can be managed through the course website. In this way, it is possible to mark for each student whether they were present, absent or late for class. You can also produce a summary report at the end of the course.
1. Turn on Edit mode
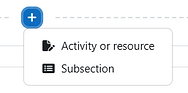
2. Choose a topic, click on and choose “Activity or resource”
3. Choose “Attendance”.


4. Go to the "Grade" section. In this section it is possible to determine the grading method for attendance in the course:


No grade will be given for attendance
Fail/pass grade will be transferred to the grade report
Numerical grade will be transferred to the grade report
5. To finish, click on "Save and display" and go to the stage of setting the meetings.


6. In the next page, you can see all the course sessions. To add course lessons, click the "Add Session" button.
7. In the "Date" and "Time" sections set the date of the first meeting.

8. In the "Multiple sessions" section:

Check the box if the meeting is repeated, to create a series of sessions.
Check the box if the meeting is repeated, to create a series of sessions.
Mark the relevant day(s) of the course.
if the class is held once a week leave 1, if the class is held once every two weeks choose "2", etc.
Define the date of the last class in the course, for example in the first semester: January 31, 2025.
To finish, click "Add".

Sessions will appear chronologically in the activity, along with icons on the right side:

Delete session
Edit session
Take attendance
Changed attendance
It is possible to define that the students record their own attendance or that the students' attendance can be marked by the lecturer.
Students can be allowed to record their own attendance in several ways.
In order to do this, you must be on the page adding a session or editing a session ( ).

Go to the "Student Recording" field and check the "Allow students to record own attendance" section.

There are three ways for students to self-register:
Way 1 - Self-registration of attendance using a QR code
1. In the "Student Recording" field, make sure that the "Allow students to record own attendance" section is checked
2. Select "Rotate QR code to register to class (rotate every 50 sec)" by checking the checkbox.
3. Choose how long before the start of the class it will be possible to access the attendance component and register.
If relevant, set how many minutes before class the item will open to update attendance in the field “Open session early for marking”, for example 10 minutes. If you don't want to open this option, leave the default 0 minutes.
4. To finish, click "Save changes".


5. In the "All" tab, all scheduled meetings are displayed. You can also choose to display the sessions by months/weeks/days.
6. In order to activate the self-registration in the class:
-
At the beginning of the class with self-attendance registration via QR code, click on the QR code icon in the lesson date row. A QR code will be projected on the screen in the classroom and will change every 50 seconds.
-
The students will be asked upon entering the class to scan the code, connect to Moodle with their user and then receive a message that their “attendance in this session has been successfully recorded”.
-
The code will only appear on the lecturer's computer and must be shared with the students (projected on the screen in class/shared screen in Zoom session, etc.)
A meeting set up for self-registration via QR code

Way 2 – self-attendance recording using a password
You can set a permanent password, in the text box below the "Register to class with chosen password" section.

1
2
3
1. Tick the box in the "Automatic marking" section: “Allow students to record own attendance”
2. Check the box in the "Register to class with chosen password" section.
3. Write the password you chose in the panel.
4. To finish, click on "Save changes".
A class with a password for registration will display the key icon:


A meeting set up for self-registration with a password
Way 3 - Automatic self-registration of attendance to the highest attendance status
Students can automatically register themselves as soon as they enter the Attendance activity.

1
2
3
1. Tick the box in the "Automatic marking" section: “Allow students to record own attendance”
2. Check the box in the "Automatically select highest status available (P=Present)" section.
3. To finish, click on "Save changes".
4. As soon as the students enter the course item on the course website, their attendance in the class will be immediately registered.
1. In the "Student recording" field, in the "Automatic marking" section, define whether you want automatic attendance to be registered for the missing students: “Set unmarked at end of session”, or when completing one of the course activities: “On activity completion”

2. In the section "Select activity" a list of the activities in the course will open.
Choose the activity where automatic attendance will be registered for students. You can choose one of the course activities that upon completion will be registered as student attendance, or choose the student attendance item.

3. To finish, click on "Add".
1. In order to update attendance (by the lecturer) at a certain meeting, click on the triangle sign in the "Actions" column.


2. Next to each student's name, mark the relevant attendance status. You can add comments.
At the bottom of the page on the left you can see the available presence modes.
To proceed click on "Save and show next page" and to finish, click on "Save and back".

3. You can change the attendance modes provided by default in the Moodle system. To do this, go to the "Status set" tab to define the presence modes that will be used. The default is 4 modes:
i. Presence- P Present
ii. Late - L Late
iii. Absence - A Absent
iv. Approved absence - E Excused
In the default attendance settings, each of the four attendance statuses is automatically given a "score" out of 2 points, where: present status receives full points (2 points), late and excused receive half of the points (1 point), and absent status receives no points (0 points).

Definitions:
i. In the "Description" column, you can define whether to use the existing modes or define new presence modes (for example, "left before the end of the lesson", "present remotely", etc.).
ii. In the "points" column you can define whether each attendance status will receive a score and if so, how many points for each status.
iii. If in the meeting settings you set that the item will open for registration before the start of the meeting, V can be marked in the "Available before session start" column.
iv. In the column "automatically set when not marked" you can define "absent" as a status that will be automatically registered for any student who has not updated his status as present (if self-registration has been defined).
v. Custom presence modes can be added using the gray "Add" tab.
To finish, click on "Update".

4. To view the summary attendance report of all students in all sessions, go to the "Report" tab.
The letter "i" indicates that a student attended independently (possible by defining the item in advance for a certain meeting)
The question mark indicates that the attendance status for this session has not been updated for the marked students.
Each presence status appears in a different color.


5. In the "Export" tab, you can export the attendance report to an Excel file, by clicking "OK".


1. Upon entering the attendance item on the course website, students have the option to see their attendance status in 3 tabs:
"This course" - summary of attendance statuses on the current course website
"All courses" - summary of attendance in all the courses in which they are registered
"All sessions" - attendance at all classes, according to courses

2. For self-registration of attendance at the session defined with a password, the students enter the attendance item during class, and register themselves at the "Submit attendance" link.
In the screen that opens, they type the defined password and their presence status and save changes.
3. For the purpose of self-registration of attendance at the meeting defined with a QR code, the students scan the code that appears on the screen at the beginning of the lesson. Upon scanning, they will be asked to log in using their personal user to the Moodle system and then receive a message that their registration has been successfully received. When they enter the course attendance item, they will see that their attendance status in that class is present and in the notes it will be recorded that the attendance is "self-recorded".
