Glossary
Glossary is a learning tool allowing students to create a glossary of terms.
The activity can be configured so that students create the terms themselves (possibly as a graded assignment), or the instructor creates the terms (as a glossary).
1. Turn on Edit mode
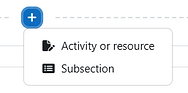
2. Choose a topic, click on and choose “Activity or resource”
3. Choose “Glossary”.
4. In the "Name" field, enter the name of the glossary - for example: "Course Glossary".
5. A description, instructions or an explanation of the activity can be added in the "Description" field.
6. Check the box "Display instructions on the course main page" so that the instructions appear on the course homepage.


Entries in a global glossary are linked from throughout Moodle, rather than only in the website course. This can only be set by administrators.
7. Choose the type of glossary:

A glossary in which entries from secondary glossaries can be imported. There can only be one main glossary in a course
If glossary entry import is not required, all glossaries in the course can be secondary glossaries.
8. For glossary entries, the following options are available:

Are submitted entries approved manually by the teacher, or are automatically approved?
Are all entries editable, or can students only edit their own entries during a configured editing time?
Can multiple entries have the same name?
Can students leave comments on glossary entries?
If "Yes", the "Add a new entry" form will include the option to automatically link the entry wherever the concept words and phrases appear throughout the rest of the course.

1
2
3
4
5
6
7
9. For the glossary's appearance, the following options are available:

-
Continuous without author - Entries are displayed one after another without any separation apart from the editing icons
-
Encyclopedia - As for "Full with author" but attached images are shown inline
-
Entry list - Concepts are listed as links
-
FAQ - The words QUESTION and ANSWER are appended to the concept and definition respectively
-
Full with author - A forum-like display format showing the author's data and with attachments shown as links
-
Full without author - A forum-like display format without authors and with attachments shown as links
-
Simple, dictionary style - No authors are displayed and attachments are shown as links

Participants can browse the glossary by letters of the alphabet.
Participants can browse all entries at once.
Participants can browse the glossary by special characters (@ or #).
Students are provided with a link to a printer-friendly version of the glossary. The link is always available to teachers.
When approving glossary items, it is possible to use a different display format
9. For the glossary's rating system, the following options are available:

-
Only users with a "Teaching Staff" role (along with any relevant activity-specific permissions) can rate items.
-
The list of role settings is available via the "Permissions" link in the administration block.

Define how ratings are combined to form the final grade of the Glossary activity:
If an aggregate type is chosen, a settings window for the type of grade will appear:


10. When finished, click "Save and display".
The following is the Glossary dashboard. The different entries can be browsed alphabetically, by category, by date, or by author - the layout of the dashboard will change according to your choice. Entries can also be exported or printed.


1. To add a new entry, click on .


2. Enter the name of the concept, as well as a definition, which can include different media (links, images, video clips, GIFs).

3. Certain keywords can be defined for each concept, entered on a new line and not separated by commas. If the entry is auto-linked, then the keywords will also be auto-linked.
Attachments can also be added to the concept page.
4. In the Auto-linking section, the following options are available:

1
2
3
-
The entry will be automatically linked wherever the concept words and phrases appear throughout the rest of the course.
-
Specify whether matching exact upper and lower case is necessary when auto-linking to an entry.
-
Specify whether only whole words will be linked - for example, the entry "gender" will not create a link inside the word "engender".
5. This is what an entry looks like from a teacher's perspective. It is identical to a student's perspective, only without the editing and deleting permissions.

Display of keywords
Display of comments
Calculation of ratings
Link entry
Delete entry
Edit
entry