Learning Map
There are activities in Moodle that can be used to track the completion of the course or study units, such as Learning Map.
This resource allows the teaching staff to build a visual map of the learning process in a specific unit of the course, which can include various tasks to be completed along the way.
Advantages of using a Learning Map:
-
The lecturers can see a snapshot of the students' progress
-
Helps in organizing tasks, especially in self-directed learning units and complex courses
-
Helps students manage their learning
1. Turn on Edit mode
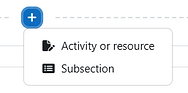
2. Choose a topic, click on and choose “Activity or resource”
3. Choose “Learning Map”
4. When setting up the resource, name the Learning Map and if necessary, add a description:
5. Set the colors for Places (tasks or resources included in the Map), Visited (viewed resources or completed tasks), and the Paths that lead from one Place to the next.
The button “How to use the editor” provides instructions to establishing Places and placing Paths between them.
6. Clicking on the icon, choose the relevant options for your Map in “Advanced settings”. Click on the next to each setting to read more about its function.
7. To display the map on the main page, check V next to “Show map on course page” – otherwise, a link will be displayed.
By checking “Show link to learning map on item pages…”, a link to the Map will appear in each “Place”.
8. In the “Background image” field, you may add the Map’s background by dragging or uploading picture file from the computer.
9. Click “Save the return to course”.


To add resources or tasks necessary for the completion of the student’s learning journey, they all must first be added to the course site.

Note: Each resource/task that is added to the Learning Map must have specified “Completion conditions”. This way, after linking the resources/tasks to the Learning Map, a completion of each one will result in a V on the Map.

It is possible to hide the activities students are to complete throughout the course, so they will not be displayed on the main page of the course site, thus only accessed through the Learning Map.
1. Turn on Edit mode
2. Click on next to the desired activity, click on "Availability", and choose “Make available but don’t show on course page”.
3. The Learning Map will be shown like this from a teacher’s perspective, showing the hidden activities:
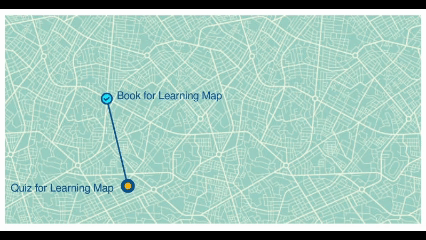
4. The learning Map will be shown like this from a student’s perspective, where Places are only accessible through the Map:


Clicking on "Completion" will show the necessary conditions to complete the task/activity.
The last step is inputting the dots (Places) on the Learning Map, and linking them to specific resources or tasks.
1. Turn on the Edit mode
2. Access the settings of the Learning Map
3. The button “How to use the editor” provides instructions to establishing Places and placing Paths between them.
4. For example, to place a new dot on the Map, double-click a specific section.
5. Right-click on the newly placed dot to link it to a specific activity. In the window “Edit place”, scroll and select the relevant activity from the drop-down menu.
If this is the last activity, set it as “Target place”. If this is an activity in between the first and the last, do not set it as anything.
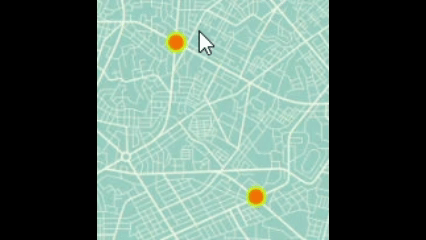
7. Activities that were already linked to dots will appear in green, thereby showing which activities have yet to be assigned to the Learning Map.
Activities without Completion conditions, which therefore cannot be added to the map, will appear in orange.
8. To connect two Places with a Path, click once on the two dots you would like to connect.
This is what the Learning Map looks in editing mode like after placing the dots, connecting them, and assigning each dot an activity:
9. The placement of the dot can be moved by dragging it. Likewise, the name of the activity can also be moved by dragging the text box around the dot.


If students must complete this activity first, right-click on the dot and set it as the “Starting place”.


1. From the student’s perspective, the entire learning process can be facilitated and followed through the Learning Map.
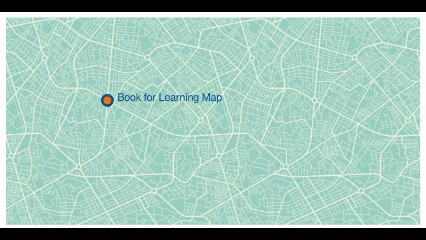
This is what a Map might look like prior to the start of the course:
The students click on the first dot and are taken to the first activity.
2. After completing the activity, the dot will change based on the settings in "Advanced settings" - for example, the color of the completed Place will change, a V will appear, and the next dot will start flashing.
3. After completing all the necessary activities, the Learning Map will look like this: