Scheduler
The scheduler activity helps you in scheduling appointments with your students.
Teachers specify time slots for meetings, students then choose one of them on Moodle. Teachers in turn can record the outcome of the meeting - and optionally a grade - within the scheduler.
Group scheduling is supported; that is, each time slot can accommodate several students, and optionally it is possible to schedule appointments for entire groups at the same time.
1. Turn on Edit mode
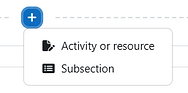
2. Choose a topic, click on and choose “Activity or resource”
3. Choose “Scheduler”.
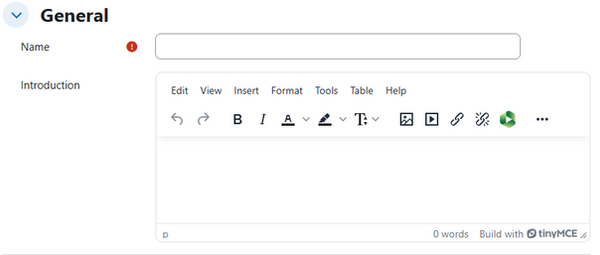
4. When setting up the resource, name the Scheduler and provide an introduction or description:
Enter the title of the instructor
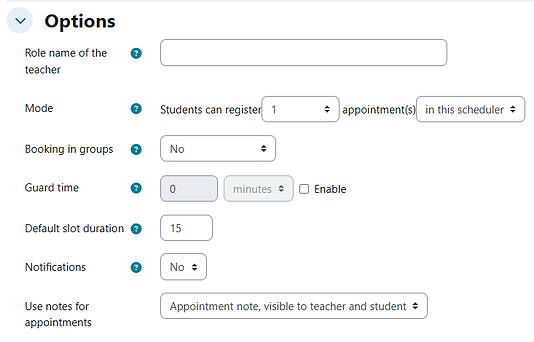
Choose the number of appointments students can book, and how often they can be scheduled
-
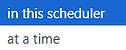
In this scheduler = only when using this resource
-
At a time = A new meeting can be scheduled only once the first one has ended
Choose what types of notes - if any at all - will be used in the appointment, and who it will be visible to
5. Set certain options for the scheduler, including the number of appointments students can book, whether they can do so in groups, the use of a guard time, and appointment notes.
Prevents students from changing their booking shortly before the appointment.
If the guard time is enabled and set to 1 hour, then students will be unable:
-
to book a slot that starts in less than one hour's time from now
-
to drop an appointment if it start in less than one hour


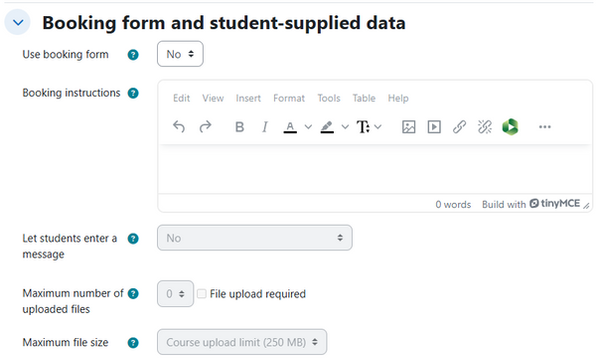
6. Set up a booking form for the students, and choose whether they can provide additional information, including a message and files.
A
B
C
D
E
A. Choose whether or not to use a booking form
B. Enter booking instructions for the students - for example, how many appointments they can book or with how many other students
C. Choose whether students can add a message to their booking form
D. Choose the maximum number of files students can upload with their booking form
E. Choose the maximum file size students can upload with their booking form
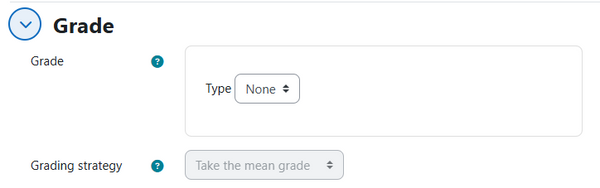
7. It is possible to assign a grade for attending and taking part in the scheduled meetings, in the "Grade" settings:

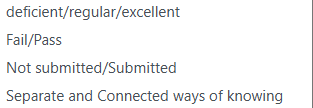
The choice of "Scale"-type grade will provide you with the following grading options:
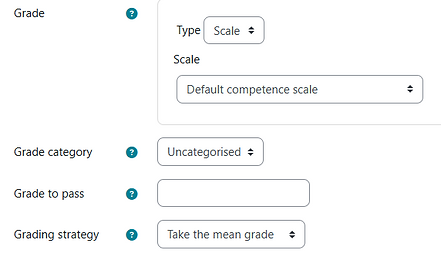
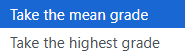
Students are likely to be graded on several appointments, and so there are two calculation strategies - the mean grade or the highest grade.
To finish, click on "Save and display" at the bottom of the screen.

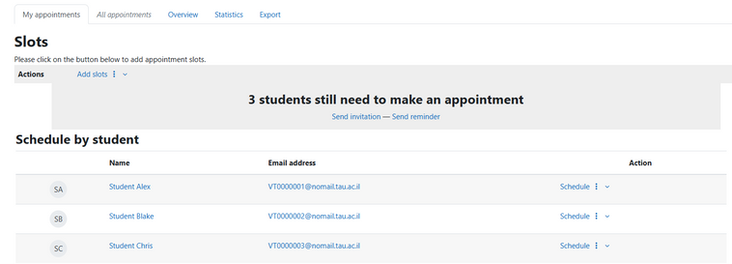
1. Use the main Scheduler dashboard to do the following:
C
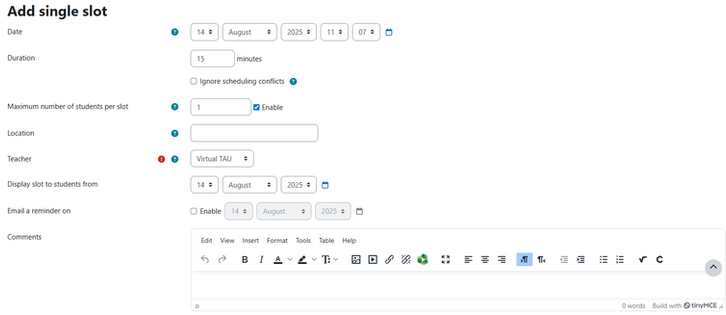
Add time slots for students to choose from - either a single time slot, or repeating slots.
A

1
2
3
4
5
6
7
8
-
Choose the date and time of the slot
-
Choose how many minutes it will last, and whether you want to take scheduling conflicts into consideration
-
Set the maximum number of students that can book this slot
-
Enter the location of the meeting
-
Choose the teacher that will be available in this slot
-
Choose from which date to display the slot to students
-
Choose whether or not to send students a reminder about their chosen slot
-
Enter any relevant comments that will be included with the reminder
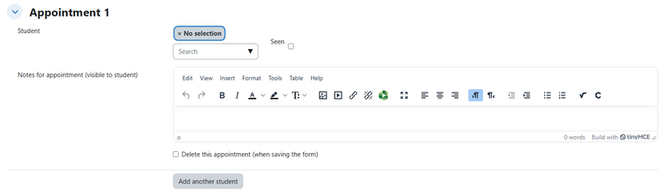
Each slot, by deafult, has one appointment booked:
9
10
11
12
9. Assign a student for the slot
10. Add notes for the meeting which will be visible for the student, such as topic or focus of meeting
11. Delete this appointment by checking the box and clicking the button.
12. After clicking on "Add another student", a new section titled "Appointment 2" will appear, where once again a student has to be selected, and a note can be added.

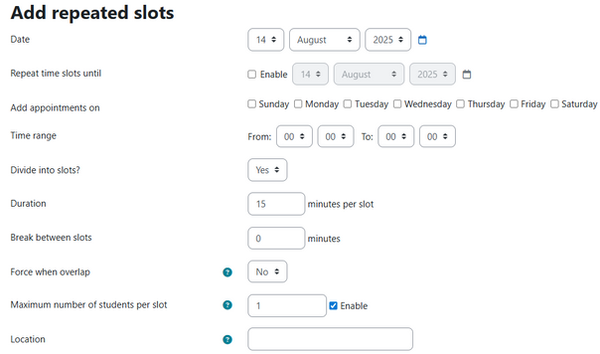
If "repeated slots" are chosen, the following settings should be entered:
1
2
3
4
5
6
7
8
9
10
11
12
13
-
Choose the date and time of the repeated slots
-
Choose until when the slots will repeat
-
Choose the days in which the slots will repeat
-
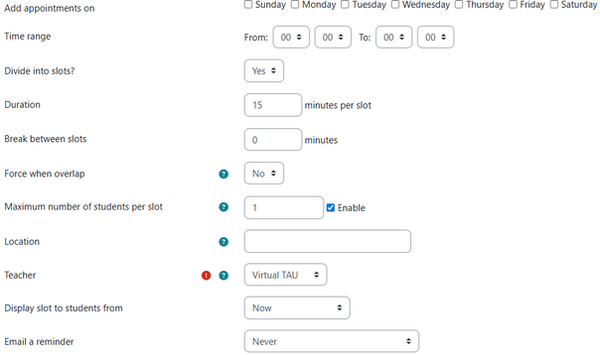
Choose the time range of the slots
-
Choose whether or not to create multiple slots fitting within the range specified above.
-
Set the time duration for each slot.
-
Choose whether or not to set breaks between slots.
-
Create a slot even if there are some other slots on the way. This will remove the old slots after the new ones are created.
-
Set the maximum number of students that can book this slot
-
Enter the location of the meeting
-
Choose the teacher that will be available in this slot
-
Choose from which date to display the slot to students
-
Choose whether or not to send students a reminder about their chosen slot
B
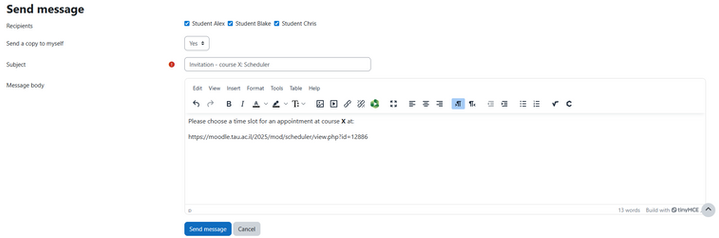
Send invitations and reminders for students - both will be sent as messages by clicking on one of the links:
1
2
3
4
-
Choose the recipients of the invitation by ticking the box next to the student's name
-
Choose whether or not to send yourself a copy
-
Enter the subject of the invitation - an automatic subject is produced
-
Enter the body of the invitation - automatic content is produced, along with a URL link
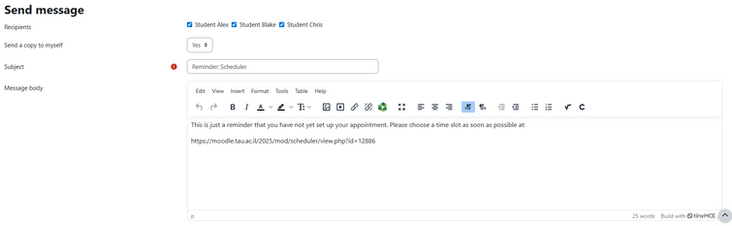
A reminder message is similarly outlined:
C
Schedule each student in a slot.
When clicking on "Schedule", the following window will open:

Fill in the same form as the one for adding a time slot.
Mark student as having just attended a meeting
This is the Scheduler from a student's perspective:

Students are able to cancel meetings
This is the Scheduler from a teacher's perspective, who can edit the appointment using the actions menu on the right:
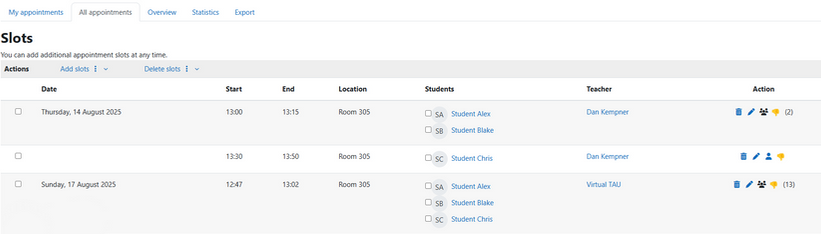
Delete appointment
Edit appointment
Non-exclusive appointment
Revoke appointment
Number of open slots
Exclusive appointment
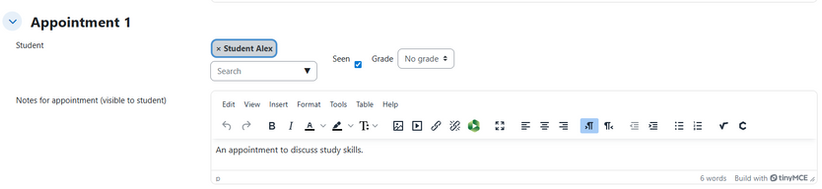
1. To mark a student as present for the appointment, tick their name:

2. Then, when, editing the appointment, the student will be marked as "Seen":

3. Afterwards, a grade box will appear next to the student's name:

4. On the Scheduler's main page, different tabs offer different overviews and actions:

Only the appointments held by you
All the appointments in the course
An overview of all meetings and results
The statistics of all appointments, including attendance and availability. They can be sorted by student, teacher, slot duration and group size.
Exporting data on students, slots, and appointments in a variety of file formats
5. When clicking on "Overview", the teacher can see the following information:
Course title
Name of scheduler resource
Date and time
Location
Participants
Description of the entire time slot (as entered in Settings > Comments)
Grade
Description of the specific appointment (as entered in Settings > Appointment > Notes)