Panopto Recordings
Recordings that have not been watched for 6 months will be archived and therefore unavailable for viewing. They can be restored, the process may take up to 48 hours. For instructions, click here.
Recordings that have not been watched for 30 days after they were returned from the archive will be archived automatically again.
Publication of class recordings for students
The recordings of the meetings created through the Zoom resource on the Moodle course website are automatically moved to the course folder on the Panopto server.
They will be visible for Teachers in the Panopto block on the right part of the screen, on the course website in gray. The students will not be able to see them until they are approved for publication by the owner of the recording, and will appear in blue.

There are two options for publishing the recordings:
A. Publication of a single recording – click here for instructions.
B. Publication of all recordings in the course folder at once.
All recording scheduled via Zoom on the course website will be moved to the course folder in Panopto and will be published to students automatically – click here for instructions.
How to publish a recording of a single lesson to students?
1. Go to the relevant course website, and in the Panopto block on the right part of the screen, click on "Course settings".
2. Close the pop up window that will open on the Panopto website by clicking on the X.

3. Select the recording you want to make available to students, hover your mouse over the name of the recording, and click the 'Publish' button, which looks like an eye icon.

Now, the students will be able to see the recordings published in the Panopto block on the right part of the screen, on the course website.

How to publish the entire course folder to students?
1. Go to the relevant course website, and in the Panopto block on the right part of the screen, click on "Course settings".
2. In the pop up window that opens, scroll down to the topic "Availability". Under the heading "Session becomes available" click on "Immediately” and click on the "X" to close and save.
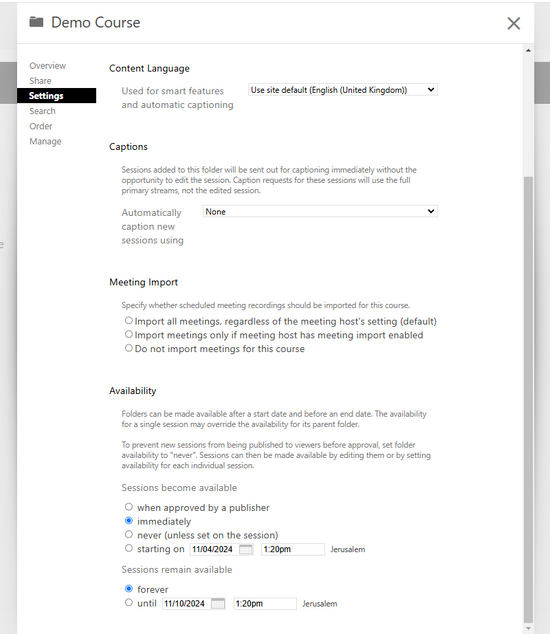
The course folder will be available for students. Every recording made through the course website will be automatically published to students and will be displayed in the Panopto block on the right part of the screen, on the course website in blue.
Sharing folder and recordings (also from previous years)
The course folder and specific recordings in Panopto can be shared with students enrolled in courses in the current academic year, even if they are from previous years. You can share them with all course participants or with specific users.
Please note: if the recordings have not been viewed for more than six months and have been archived, they must be restored in order to be able to view them. Instructions for restoring from the archive - here.
1. Log into Moodle. In the My Courses page, click on the "Courses from past years" and choose the relevant year. (Pay attention to the academic year in which the course took place: if the course was delivered in 2021-22, you must log into Moodle for תשפ"ב, etc.).

2. In the Panopto block on the right part of the screen on the course website, click on "Course settings”.

3. Close the pop up window that will open on the Panopto website by clicking on the X.
There are two options for sharing the recordings:
A. Sharing the entire course folder B. Sharing a specific recording
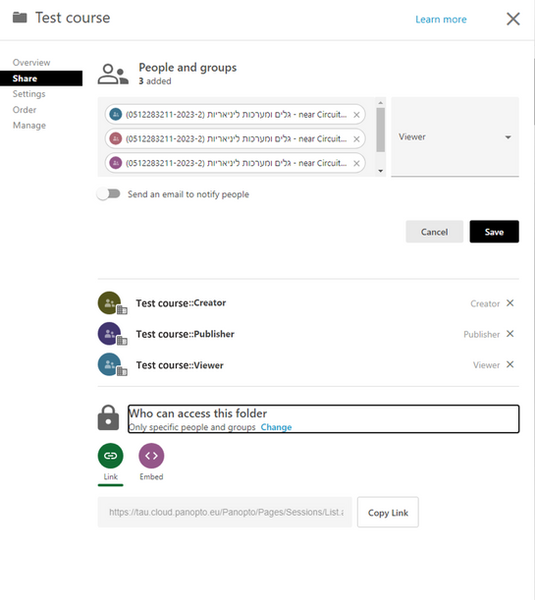
4. To share the entire folder, click on the Share symbol located in the upper right corner.
4. To share a specific recording (or multiple), select the recording(s) and click on the Share button under the Course name.


5. In the “Add people and groups” field, you can either share with all course students, a specific student or multiple students.
Option A - To grant viewing privileges to all course students:
Type in the course number of the current academic year (for example: 0116593799-2024-1).
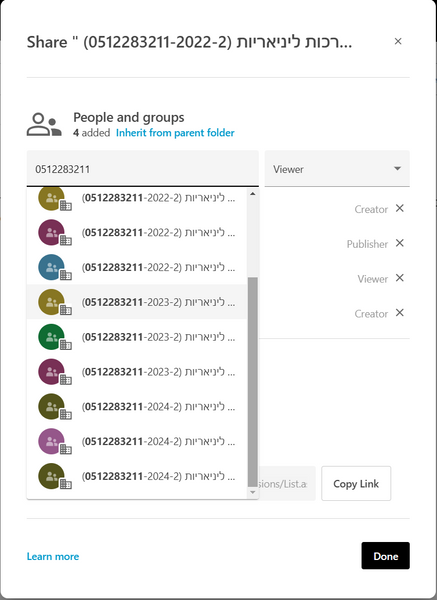

Choose the three suggested groups of the course number for the current academic year (each line is separate).
Click on "Save".
Option B - To grant viewing privileges to a specific user:
Type in the username, or name, or a university email address (Remember to select the option that starts with unified\).
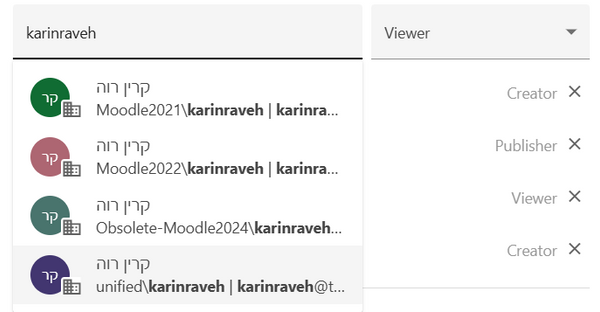

After the user is identified by Panopto, click "Save" and then click "Done".
To send a message to the user who received the permission - click on "Send an email to notify people".
Option C - To grant viewing privileges to multiple users:
Type in a space-separated list of usernames.
Wait until the options list appears and choose "Add multiple users from Moodle2024"

After the users are identified by Panopto, click "Save" and then click "Done".
To send a message to the users who received the permission - click on "Send an email to notify people".

How to add a link to the recordings in the Course website?
1. Click on "Copy Link" in the Share window in Panopto - in the recording or folder to which you want to give access to.
2. Return to the course website in Moodle (make sure you are in the current school year). Add the "URL" resource in the relevant topic. For instructions on adding an item, click here.

3. In the "Name" field, name the link. For example "Recordings from previous years".
Paste the folder or recording link in the "External URL" field.

4. Click “Save and return to the course”. The recordings will now be available in the course website.

Restrict access to a recording
To restrict the access to a specific recording without altering the course folder settings, you can create a subfolder and select the users that have access to it.
1. Enter the folder where the course recordings are located.
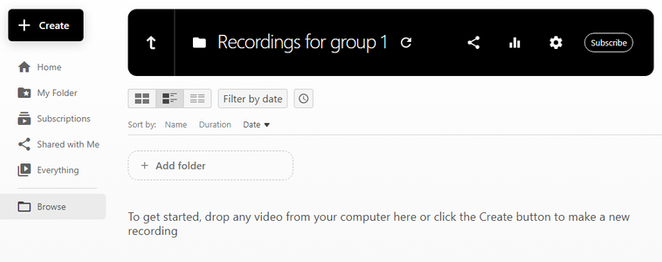
2. Click on the "Add folder" button.
3. In the "Enter name" field that opens, type in the name of the folder. (for example, "Recordings for group 1"). Finish by pressing enter on the keyboard.

4. Select the relevant recordings by clicking on the checkbox in the video thumbnail.
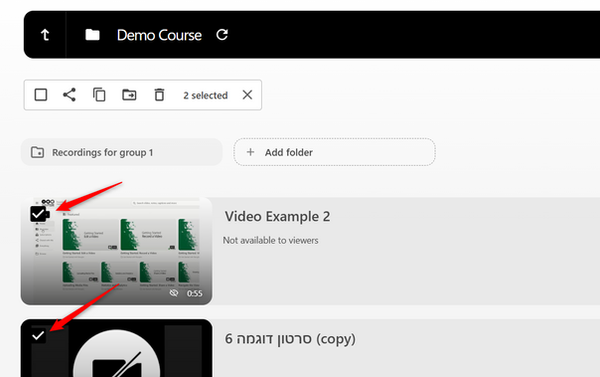
5. On the top of the page, click on the "Move" icon under the course name.

8. Enter the new folder and click on the "Share" button located in the upper right corner.
9. In the window that opens, click on the "change" button under the "People and groups" field headline.
10. In the pop-up window that opens, click on "Stop Inheriting" .
This action means that the permissions in the new folder will not depend on the course folder. (If you added someone as an authorized viewer to the course folder, they will not be automatically added to this folder)

It is important to leave the V mark next to the section: "Keep 3 members as added users" in order to keep your privileges as the owner of the folder
11. In the section named "viewer" (viewer = viewing permission for students), click on X to remove the permission for students. Leave the creator and publisher permits unchanged (=viewing permission for the teaching staff).
To finish, click save.

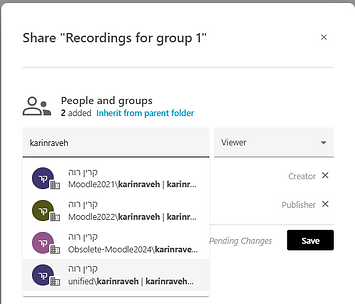
12. In the Add people and groups field, to grant viewing privileges to a specific user:
Type in the name of the user to whom you want to give viewing permission. Choose the option that starts with unified\.
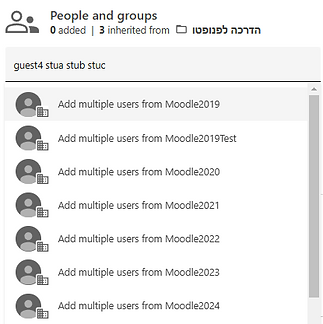
12. In the Add people and groups field, to grant viewing privileges to multiple users:
Type in a space-separated list of usernames. Wait until the options list appears and choose "Add multiple users from Moodle2024"
13. To finish, click save.
For instructions on how to copy a recording you want to share to this folder, click here.
6. Select the folder (by typing its name or searching for it), and click "Move"

7. After receiving the confirmation (check signs and "Done"), close the pop-up window.

How to embed a Panopto video in Moodle?
All Panopto course recordings will be visible to students in the Panopto block on the right of the course website on Moodle. In order for the recordings to be displayed on the course website under the relevant topic (like the other content elements in the course), the recording must be added as a new resource.
1. Go to the relevant course website on Moodle.
2. Enable "Edit Mode" on the top right.

3. Click on "Add an activity or resource" at the bottom of the topic you would like to add your
item to.

4. On the activity chooser, choose “Text and media area (Label)".


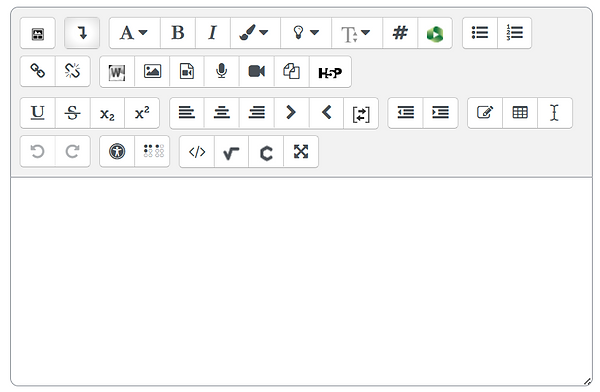
5. In the editor toolbar, select the button with the Panopto icon .
6. Select the video you want to share by clicking the box next to it. To insert it, click on "Insert".
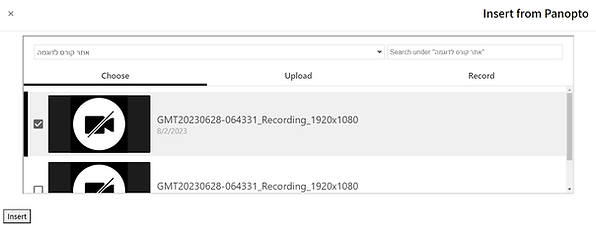
In the Movie Selection pane, only videos that are in the course folder on Panopto appear.
7. Press the "Insert" button.

8. To save, scroll to the end of the page and select "Save changes and return to course".
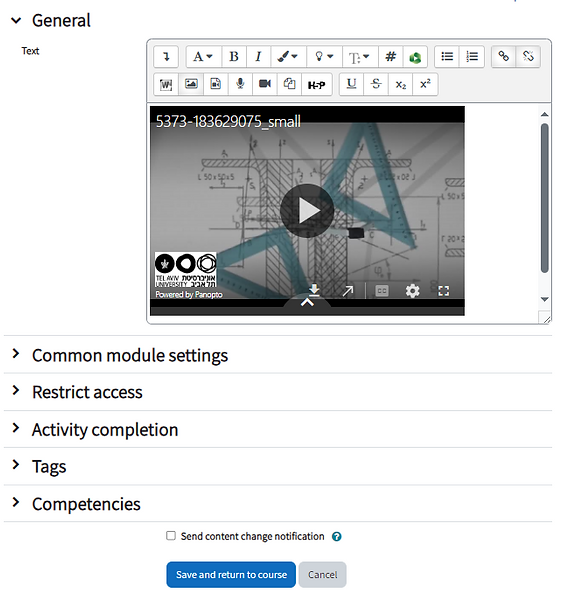
9. The video will now appear on the course website, in the desired topic.

Add a co-editor to a folder
For more people to be able to edit the folder and the recordings that are in it - there is a need to add them as co-editors. This permission is called "Creator". It is important to know that adding a user as a Creator will give them full permission to view, share, delete, etc. Creator permissions can be granted to specific users (associated with Tel Aviv University only) in the course's recording folder (as well as from previous years).
It is important to note that the default for granting permission is through the "Viewer" permission for viewing only (without the ability to edit, transfer, copy or download the recording to a computer).
1. Enter the relevant course folder in Panopto through the course website in Moodle. For instructions, click here.
2. Click on the "Share" button located in the upper right corner.

3. In the "Add people and groups" field, type in the name of the university user to whom you want to give editing permission in the folder (remember to choose the option that starts with unified\). On the right side of the screen, choose the type of permission required:
Creator = editing permission
Viewer = viewing permission only
Finally, click "Save".

4. Now you can send the link to the participants by clicking on "Copy link" and pasting it in an email (Ctrl+V) or by adding the link to the course website. For more instructions on sending Lecturer messages to students, click here.

Restoring recordings from the archive in Panopto
Due to storage limitations, unwatched Panopto recordings are automatically archived.
In the course folder - recordings that have not been watched for 6 months will be archived.
In the personal folder - recordings that have not been watched for 2 months will be archived.
A recording that has been archived will be displayed as unavailable in the folder.
If the students and lecturers want to watch a recording that is in the archive, clicking on the recording will restore the video. From the moment you click on the recording, it will be restored (it can take up to 48 hours) and will be available for viewing.
If the recording has not been viewed 30 days after restoration, it will be archived again. Therefore, it is recommended to watch the restored recordings, otherwise they might be archived within 30 days.
1. Enter the relevant folder (whether it is the "Meeting Recordings" folder or a course folder).
2. Click on the "Archived" button (it will show the number of recordings in the archive).
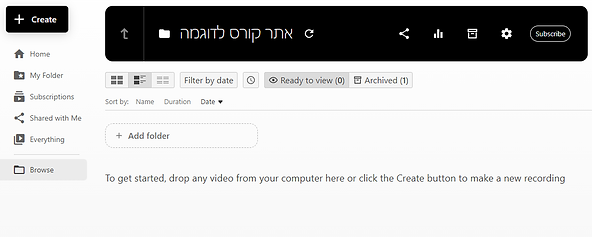
3. Check off all the recordings you wish to restore (at least one).

4. After checking all the recordings for restoration, click on "Restore".

5. Confirm the restoration in the pop-up message by clicking "OK"
6. Now the restoration process will begin and a message will be displayed: “Video restore from the archive started”. The recordings will be available for viewing within 48 hours. Panopto will also display the estimated time remaining until the recording is fully restored.

When the video is restored, you will receive an email from Panopto and the video will automatically move to the folder.
Change the order of the recordings in a folder
1. On the course site in Moodle, click "Course settings", in the Panopto block on the right.

If you don't see the menu, click the arrow tag on the right.
2. On the page that opens, select the order tab in the left menu

4. Mark the “Set the display order for this folder” field
5. Drag the items to change order

Please note: For efficient organization, you can change the recordings' names.
Change recording name
1. In the recordings folder in Panopto, hover the cursor over the recording thumbnail, and click the "settings" icon (gear)

2. On the page that opens, click “Edit” in the “Name” section

3. Type in the new name and click “Save” to finish
