Teaching Tools in

This guide includes:
Whiteboards
Zoom Whiteboards are interactive and collaborative tools that can be created before and during Zoom sessions. Its features focus on innovation and organization, and includes the use of shapes, charts, stick notes, mind-maps and cards.
Whiteboards can be used for visual brainstorming, note-taking, project organization and collaborative works, as well as visual instruction & explanation of concepts.
How to use Whiteboards?
1. Access the Zoom website. Ensure that in Settings > In Meeting (Basic), the option of sharing the Whiteboard (Classic) is turned on

2. The Whiteboards are accessible through the left-hand menu and upper toolbar on the Zoom website.
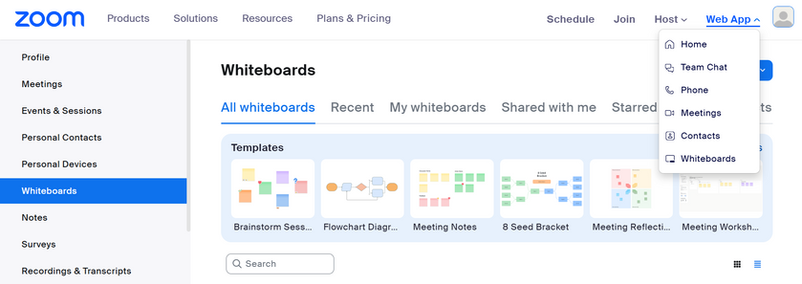
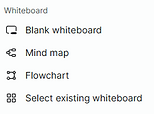
3. Click on the tab "Whiteboards". In the window that opens, locate a relevant pre-made template, or create a new one.

4. In addition to writing on the Whiteboard, there are various options for content editing:
-
The left-hand toolbar:
Select an object
Draw / write
Add text boxes
Add sticky notes
Add frames

Add shapes
Add lines
Add equations
Add comments
Select templates
More tools

-
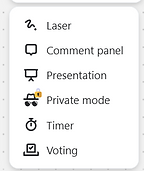
Upper toolbar:
Clicking on ("More tools") enables you to use a laser pointer, timer, voting system, and more
Clicking on "Share" enables you to choose with whom to share your board

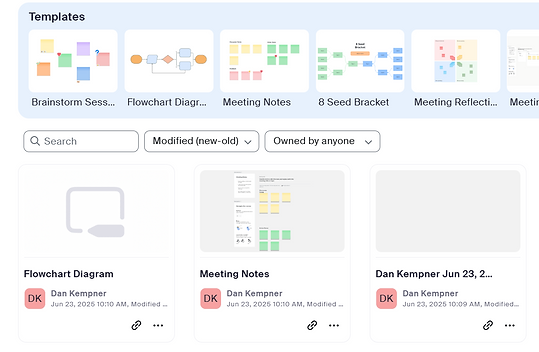
5. Your created Whiteboards will be automatically saved. They can be accessed and modified at any time, as well as setting certain criteria according to which the boards will be displayed.
Zoom Polls, Quizzes and Surveys allow for an interactive experience before, during, and after a Zoom session, allowing for participants to share their opinions (publicly or anonymously) or to display their understanding of concept.
Polls, Quizzes & Surveys
1. Access the Zoom website.
2. Click on "Sign in" or "My Account" to log in with the personal university accout.
3. On the left-hand menu, click on "Settings".

4. Select "Meeting", and then "In Meeting (Basic)".
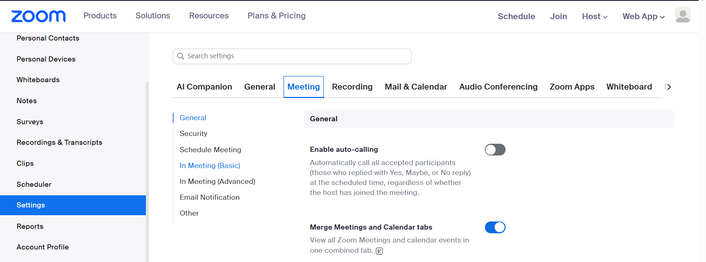
5. Ensure that the "Meeting Polls/Quizzes" is active (blue).

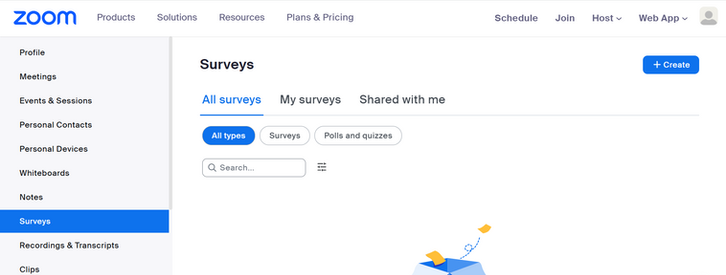
6. On the left-hand menu, select "Surveys". Click on "Create", then choose whether you would like to create a survey, a quiz, or a poll.

Surveys collect participants' responses through a link outside of the Zoom session, while polls and quizzes are integrated into the Zoom session.

Polls
Polls can be used to acquire an overall insight from participants, such as opinions or preferences. Their choices can be used to divide them into Breakout Rooms for a more focused discussion.
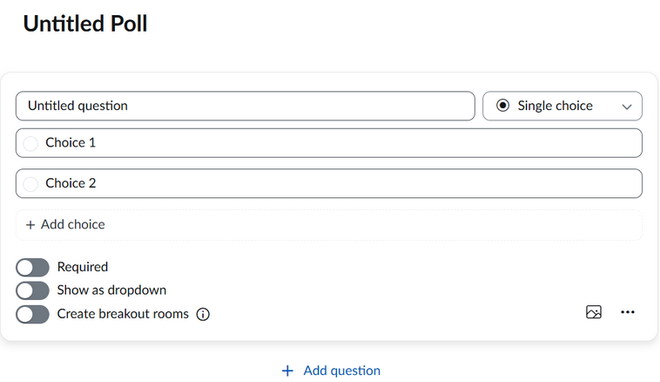
1. Click on "Untitled Poll" to change the title of the poll.

To make responses anonymous, click on
2. Click on "Untitled Question" to set the question. In addition, the icon allows you to add an image, while the icon allows you to either duplicate or delete the question.
Hosts can create breakout rooms in meetings based on participant answers
Upload image

3. Click on "Single choice" to change the type of poll question. To add an additional choice, select "Multiple choice". To add even more, click on "+ Add choice".

Add an additional choice in the poll
Add an additional question
4. To save the poll, click on "Save" in the upper right corner.

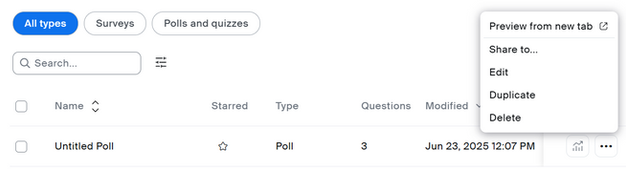
5. On the main Surveys page, click on the icon to share, edit, duplicate or delete the poll.

6. During the Zoom session, click on "Polls/quizzes" to launch the poll.


7. In the window that popped up, click on "Launch".
8. Once all participants have participated in the poll, click on "End poll".

The poll can also be shared through a QR code.

9. Once the poll has ended, the results can be shared with the participants by click on "Share results".
Click on to re-launch the poll or download the results to your personal computer.

10. Click on to view the results of the poll.
Quizzes
Zoom quizzes can be used for gradeless in-class assessments, checking for general understanding of a newly-taught topic or revision of last class. Quizzes can also be completed either with the participants' names or anonymously
1. To switch a poll into a quiz, ensure the "Make it a quiz" option is enabled (in blue) at the top of the page. Click on "set answer" to choose the correct answer.


2. There are more types of questions in addition to single and multiple choices, including matching, ranking, fill in the blank, rating and text-based answers.

Entering questions:
Setting answers:
Matching


Rank order


Fill in the blanks


Rating scale

3. Once all the answers have been submitted, click on End poll. On the main Surveys page, click on the icon to view results.


4. Results can be shown by launch (time of quiz), by respondent (by name or anonymously), or as a general overview.

Surveys
Surveys can be used for projects, webinars and research that are not necessarily a part of specific lessons.
1. The survey can be modified in the the top, right-hand toolbar:

-
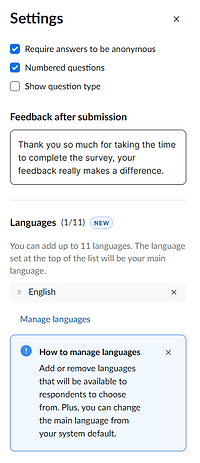
Clicking on opens the various survey settings, including display, feedback messages, and languages:
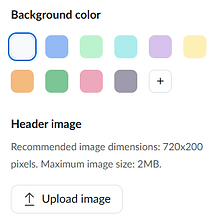
-
Clicking on opens the theme modifier, including background color and header image:
2. The survey questions can be managed on the left-hand side:

Change order
Delete
Duplicate
3. A "Skip logic" function can be added by clicking on .

This function enables users to skip either to a different question, or to the end of the survey:

Choosing "Yes" will move the participant to the next question
Choosing "No" will end the survey for the participant
Using this function will make the question a required question, and will place it on its own page:

4. Once finished, click and a sharing window will open.

5. On the main Surveys page, click on to see the results.


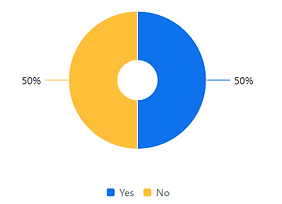
5. The results page, click on to choose whether or not to show results with charts.
Charts can either be shown as bars:

Or, by clicking on , it can be shown as a pie chart:
6. Likewise, results can be shown as text:

7. The results can be downloaded by clicking on in the upper-right toolbar.
8. Clicking on in the upper-right toolbar will stop collecting responses:

9. The survey can be published again by clicking on in the upper-right toolbar.
Breakout Rooms
Zoom Breakout Rooms allow the Host / Co-Host to divide participate into working groups and gather them back together after a specific amount of time. This division can only be done through a computer (and not through a mobile phone).
Properties of Breakout Rooms:
1. The maximum number of rooms is 50
2. The division can be done in three ways:
-
Automatically (without the Host's intervention)
-
Manually (the Host divides the participants into rooms)
-
Self-division (the participants choose which room to join)
3. Following the division, each room includes all regular options – camera, microphone, chat, and screen sharing.
4. There are available settings for Breakout rooms, such as their timings.
5. Participants can record in the room, but only if the recording is saved on the personal computer and not in the cloud.
Breakout Rooms can be used for smaller, more focused discussions in groups, including brainstorming, planning, or completing group tasks.
Breakout Room button on the Zoom website
1. Enter the Zoom website
2. Click on the "Sign in" or "My Account" to log in with the personal university account
3. Click on "Settings"

4. Click on "Meeting (Advanced)" in the left-hand menu

5. Ensure the "Breakout Room" button is active (in blue)

1. Join the Zoom session
2. Click on "Breakout Room" in the toolbar

Automatic division into Breakout Rooms
The participants will be randomly divided into Breakout Rooms
1. Click on the "Assign automatically" option
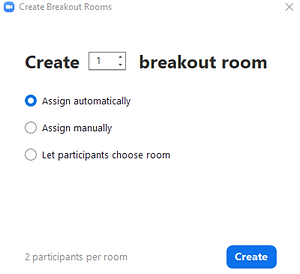
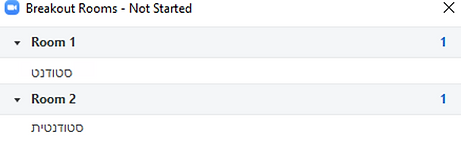
2. Set the number of rooms you would like to open

It is possible to see how many participants will be in each room by looking at the number next to "participants in each room"
3. Click on "Create"

4. Click on "Open All Rooms" to split the participants into rooms


5. The participants will receive a message (invitation) to join the room which they should accept.
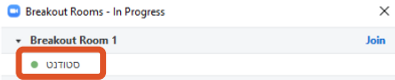
6. A green icon will appear next to a participant who has joined the room
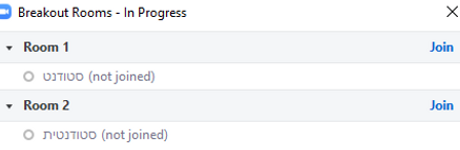
7. A white icon will appear next to a participant who has not yet joined the room

Manual division into Breakout Rooms
The Host or Co-Host can manually divide the participants into rooms by setting the number of rooms and then assigning relevant participants to each room.
1. Click on the "Assign manually" option

2. Set the number of rooms you would like to open

3. Click on "Create"

4. Click on "Assign" to assign participants to a specific room

5. Check next to the relevant participants

6. Repeat the action for each room until all participants are assigned
7. Click on "Open All Rooms" to split the participants into rooms
8. The participants will receive a message (invitation) to join the room which they should accept
9. A green icon will appear next to a participant who has joined the room
10. A white icon will appear next to a participant who has not yet joined the room

Division by the participants
The participants decide which Breakout Room they will join.
In older versions of Zoom, the participants will be unable to assign themselves, hence it is important that all participants update their version of Zoom.
1. Click on the "Let participants choose room" option

2. Set the number of rooms you would like to open

3. Click on "Create"

4. A "Breakout Room" button will appear to all participants who can choose which room they would like to join.
5. A green icon will appear next to a participant who has joined the room
6. A white icon will appear next to a participant who has not yet joined the room
Breakout Rooms can also be set up prior to the start of the Zoom session. The number of rooms should be set when setting up the session.
However, it is not recommended to assign participants to the room in advance, as it is unknown which version of Zoom each participant has, or which e-mail address they use.
Advanced Breakout Rooms settings
By clicking on "Open All Rooms", the following options are available:
-
Allowing students to choose their own rooms, even if the rooms were previously assigned manually/automatically.
-
Allowing students to return to the main room at any moment.
-
Setting the length of work time in Breakout Rooms.
-
Setting a countdown clock to the closing of Breakout Rooms and returning to the main room.
1. Click on "Options", and a window with additional options will appear.
2. Mark in the relevant options for the sessions or remove the if the settings are not relevant to the session.


Host/Co-Host joining a specific room
After clicking on "Open All Rooms", the session administrators can join Breakout rooms and move amongst them.
1. Click "Join" next to the Breakout room you would like to join – for example, Room 1


2. Click "Yes"

3. While staying in a specific room, it is possible to move to a different room by clicking on "Breakout room" and then "Join".
Managing Breakout Rooms
After clicking on "Open All Rooms", session administrators can do the following:
Sending a message to all the Breakout Rooms
1. Click on "Broadcast message to all" to send a written message to all rooms.
2. Type the message and click on "Broadcast" to post the message.

Moving participants to different rooms
1. Choose the participant you wish to move

2. Click on "Move to" to choose a different room
3. Click on the room you wish to move the participant to

Responding to assistance by switching to a specific room
In case a participant needs assistance, a message will appear. Click on "Join Breakout Room" to join the room to which you were called.

Sharing screen or a message with all rooms
1. Click on "Share"

2. In "Options", check with the option "Share to breakout rooms"
3. Choose the screen you would like to share by clicking on it
4. Click "Share"

5. Now all participants in all rooms can see the shared screen
The participants will not be able to share their screens in their rooms until the participant who shares their screen (in the main room) clicks on "Stop share".
6. Click on "Broadcast" to share a written or voice message to all rooms.

Return to main room
This section explain how to return to the main room and close all Breakout Rooms.
1. Click on "Breakout Rooms".
2. Click on "Close All Rooms".
3. The participants will be automatically returned to the main rooms after 60 seconds (or another amount of time, if the default was changed).
Screen Sharing
In Zoom sessions, multiple participants can share their screen at the same time and annotate it. In addition, shared screens now have multiple layouts, including the speaker, the screen, and a virtual background.
The screen sharing functions can improve accessibility with the presenter embedded in or places next to the displayed content. The presenter can also interact with the shared screen as a background.
1. Click on next to the "Share" button, and select "Advanced sharing options".

2. To enable multiple participants to share their screen, select the second option.

3. Participants can move between the shared screen using the tabs at the top of the screen.
4. If you have more than one screen, select the one you would like to share.

5. To choose a layout other than full screen, click on "Layouts and options", choose your preferred layout, and click "Share".

6. The different layouts are:
-
Unseen Presenter
-
Shared full screen

-
Presenter in the corner
-
Shared full screen

-
Presenter in the corner
-
Shared screen is part of the screen, along with a virtual background

-
Presenter and shared screen are side-by-side
-
A virtual background can be added

The size of the presenter window can be adjusted
7. In order to annotate the shared screen, click on .

8. The following toolbar will appear:

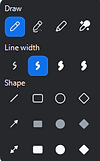
Select
Draw
Laser / arrow pointer
Color (for drawing / arrow pointer)
Mouse (regular use)
Add / edit text
Stamp (add shapes)
Eraser
Redo last action
Undo last action
Clear drawings
Close
Download screenshot as PNG or PDF
Who can see and share content of screen
9. To prevent other participants from annotating the screen, click on in the upper menu.
10. Select "Disable annotation for others".

Displaying PowerPoint as background
1. Enter the Zoom meeting.
2. Click on "Video" in the toolbar to then on the camera.

3. Click "Share".

4. Click on "Advanced".
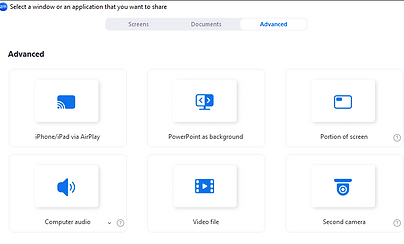
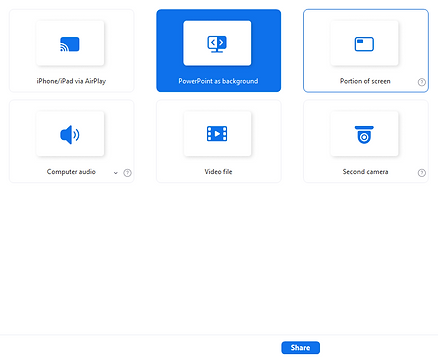
5. Click on "PowerPoint as background".

6. Click on "Share".
7. You may be asked to install a plugin to the virtual screen. Accept Zoom's request and it will be done automatically. You may need to click on "Share" again afterwards.

8. Choose the PowerPoint presentation you would like to share and click "Open".

9. To display the presenter's Video as background, click on at the bottom of the screen and then "Merge Video and PowerPoint".

10. Now the presenter's Video window is shown with the PowerPoint presentation as background.

11. To remove the presenter's Video window from the PowerPoint presentation, click on at the bottom of the screen, and then "Split Video from PowerPoint".

12. Click on X on the upper-left side of the screen to completely close the PowerPoint presentation.

Changing the presenter's window's size and placement
1. To change the placement of the presenter's video, left-click on the video until a blue frame appears around it.

2. Use the left-hand mouse click to drag the window to any point on the screen.

3. To enlarge the presenter's window, left-click on the mouse and drag one of the window's corners.

Docs
Zoom Docs function similarly to Whiteboards in a textual manner. It can be used for meeting notes, summaries, wikis, and projects.
Used either individually or collaboratively, Docs enable participants to work on lecture notes and group projects, while instructors can use it for lesson planning, class materials, and test creation.
Enabling Docs
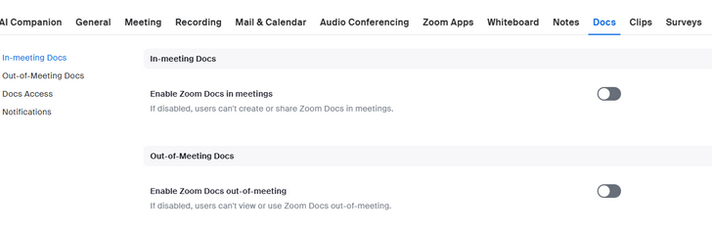
1. To enable Docs on Zoom, access the Zoom website. Click on "Settings" on the left-hand menu, and then on "Docs".

2. In the "Docs" tab, ensure "In-Meeting Docs" and "Out-of-Meeting Docs" are turned on (in blue).
3. Once Docs is enabled, it will appear on the left-hand menu.


Dashboard
When clicking on "Docs" on the left-hand menu, you will be taken to the Docs dashboard, divided here into three sections:

3
1
2
1

Create Docs based on previous Zoom session, or assign Docs to future sessions.
Access Docs that were starred for quicker access.
Access your previously created Docs.
2

Select a Doc template relevant to your Zoom session, or view all available templates.
Access your most recent Docs, create a new document or template, or import a Word document.
3

Doc - Toolbar
When starting a new document, the toolkit at the top offers the following functions, divided here into three sections:
Add a page to your document, rename your document, change its saved location, or mark it as starred.
1


Modify the appearance and function of a text, add a comment, or add an additional feature by clicking on the icon.
2
Undo / Redo action
Bold
Underline
Link
Equation
Alignment

Italics

Strikethrough
Code
Lists
Comment


3


Click here for further information on using Doc in a Zoom meeting.
Share your Doc with others, publish your Doc, integrate it in a Zoom session, or access additional settings and options by clicking on .
Modify the header's appearance and displayed information
Modify the document's font and page width
Body of Document
All of the features from the toolbar can also be accessed by typing "/" in the body of the document.


Reading time
Last update
Date
Author
Views
The chosen icon appears in the title and on the window's tab
Using Docs in Zoom
1. Click on the "Docs" icon in the Zoom session's tool bar to create or choose a pre-existing Doc.
2. Clicking on next to the "Docs" icon opens additional sharing and creating settings.

3. After clicking on the icon, the following window opens, allowing you to select recent Docs, choose a specific template, or create a Doc for co-editing. To create a private Doc, click on "Take private notes".

4. The document will then open in the Zoom session, with participants able to edit.

Open Doc in Internet browser
Copy the Doc's URL
Reload Doc
Add pages to the Doc
Manage collaborators
Close Doc
5. When clicking on in the Doc tab, the Host is able to "Spotlight this share" (make it the only shared screen), "Stop share", or "Pop out" the Doc from the Zoom session.

Pre-Recording
1. On the Zoom desktop app, click on "Clips" on the upper menu.
2. The Clips dashboard has a left-hand menu for recently made clips, shared clips, starred clips and deleted clips. Users can also create playlists based on a shared topic or function.

3. Click on "Record clip".

4. The "Record new clip" window allows you to choose the layout of the clip, as well as the microphone and camera, and the quality of the video.

Microphone
Camera
Video quality
Screen layout


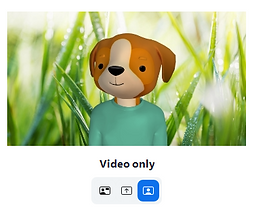
5. The three icons correspond to the three different layout options:
6. Clicking on the "Advance setting" button allows users to apply a virtual background and use an avatar, as well as applying video effects, mirroring the screen image, and adjusting the audio.


Recording
7. After clicking on "Start recording Limit: 2 mins", a toolbar will appear at the top of the screen:

Mute / unmute audio
Stop / resume video
Stop / resume screen sharing
Annotate screen
Pause recording
Discard recording
Restart recording
Stop recording
8. When clicking on a menu will appear:

Select
Draw
Mouse (regular use)
Add / edit text
Stamp (add shapes)
Laser / arrow pointer
Eraser
Color (for drawing / arrow pointer)
Clear drawings
Undo last action
Redo last action
Close
Editing

9. The first section of the editing dashboard allows the creator to adjust the speed and volume of the clip. The editor also allows trimming the length of a clip.
In addition, viewers can stop at a specific moment in the clip and leave an emoji reaction.
Add an emoji reaction to a specific moment in the clip. To remove the emoji, hover over the icon, and click the icon.

Change the speed of the clip
1

Change the volume of the clip
Trim the length of the clip by dragging the edges and clicking "Save"

Click to change confirm the change of length.

This message will appear underneath the clip. To restore the original length, click "Restore" and confirm by clicking on .
10. This section allows for the editing of the clip's description, as well as using tags to categorize it. For additional setting, including starring, duplicating and downloading the clip, click on .
2


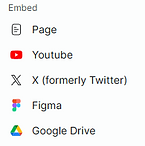
11. A clip can be shared in a general share as a URL link.
The clip can also be embedded as a thumbnail, either as a GIF or a static image.


3

12. This section allows for others to leave comments, including the tagging of specific users (by typing @) or by choosing to comment on a specific moment in the clip by placing the cursor on the video timeline:

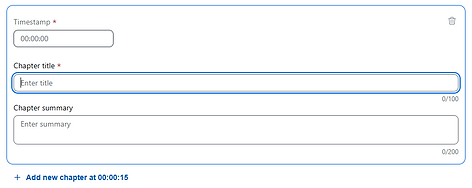
13. Clips can also be divided into chapters to allow for an easier browsing experience. After clicking on "Add chapters", provide the timestamp when the chapter starts, as well as a title and a summary.

13. In addition to editing the clip's basic information - such as the title, description, and thumbnails, a call-to-action button can be added which links to other pages.