Group Creation
All the activities on the course site (such as forum, assignment, quiz...) can support group divisions. In this way, it is possible to determine that an activity will be available to one specific group or that each group will perform the activity separately from other groups.
A Grouping is a collection of several groups within a course. Groupings allow activities to be assigned to one or more groups in the course, so that students can work together on the same task.
There are several ways to create groups:
-
By selecting students
-
Randomly
-
By uploading from Excel
-
By allowing students to choose their groups.
What's in this tutorial:
Dividing the students into groups
1. Enter the course website.
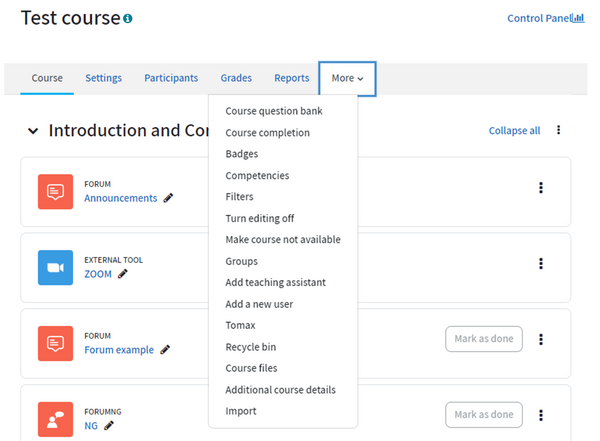
2. Click on "More" in the in the course's top menu. Then, click on "Groups".

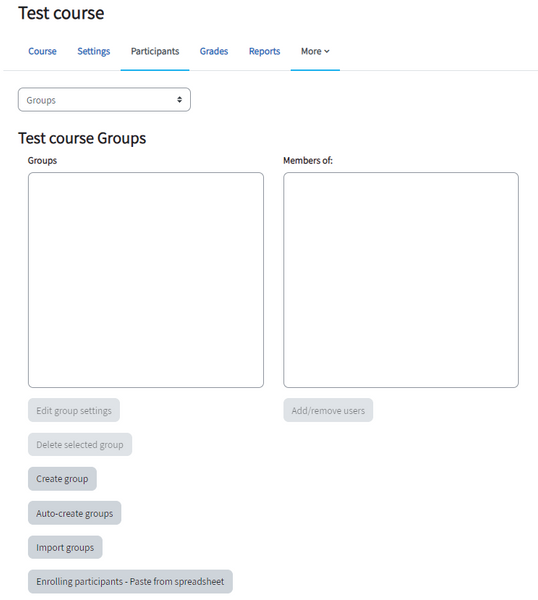
3. On the page that opens, click on "Create group".

4. In the "Group name" field, type in the name for the new group (for example, "Group 1").

5. To finish, click on "Save changes" at the bottom of the page.
Groups can be added in this way as needed.
Adding participants to groups
1. To add students to the group, mark the name of the group you created, which appears in the left table, by clicking on it.
2. Under the right table, click on "Add/remove users"

3. The names of the course participants will appear in the right block. Click on the names of the students you want to add to the group you created.
4. To complete the operation of adding them to the group, click on "Add".

New: To the right side of the display, you can see which groups the user is already a member before adding him to the intended group.
5. The names of the added participants will appear in the left table. To leave the page, click on "Back to groups"

Creating a Grouping (collection of groups)
A Grouping is a collection of several groups within a course. This collection allows tasks to be assigned to one or more groups in the course, so that students can work together on the same task.
For example, in order to create an assignment that will be submitted by groups, you must create a "grouping" and add the groups that are allowed to submit the assignment.
1. Enter the course website.
2. Click on "More" in the in the course's top menu. Then, click on "Groups".
3. On the page that opens, in the dropdown menu, select the option "Groupings".

4. In "Grouping name", type in the name of the grouping. For example: "Grouping 1".
5. Click on "Save changes".

6. On the page that opens, click on the figure icon that appears on the right.

7. In the right block, select the group(s) that you would like to add to the grouping by clicking on them and then click on "Add".

8. The names of the added groups will appear in the left block.
To leave the page, click on "Back to groupings".

You can create a "Grouping" with a single group as well.
Dividing students into random groups
This action allows to connect any activity on the course website (forum, assignment, test...) with a specific group of students.
Such a division can be a match to several situations:
-
One common activity for the entire course, to be carried out by separate groups.
-
One activity designed to be performed by only one group (out of all the participants).
1. Enter the course website and click on "More" in the top menu and then on "Groups".
2. On the page that opens, click on the "Auto-create groups"
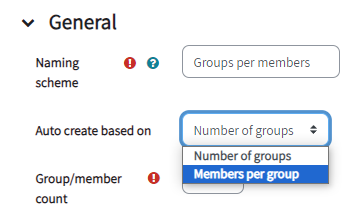
3. On the page that opens, in the "Naming scheme" field write a group name followed by a sign: # or @.
This way, each group will receive the group name and a different number (#) or letter (@).
For example, if you type in: "group #", the names of the groups will appear as follows:
"group 1", "group 2", and so on.
Alternatively, if you type in: "group @", each group will receive the letter representing the group, for example: "group A", "group B", and so on.

Random groups based on the number of groups
1. In "Auto create based on", select the option "Number of groups".
2. In the field "Group/member count", type in the desired number of groups.
3. In "Select members with role", choose "Student".
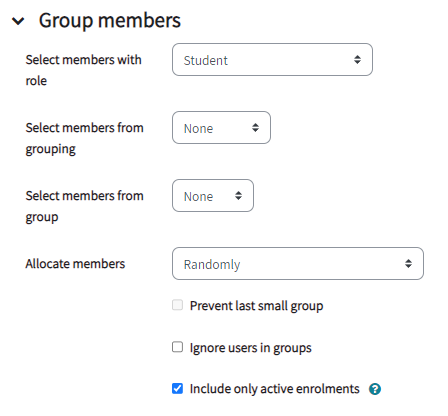
4. In "Allocate members" choose "Randomly".
5. In the section "Grouping", in the field "Grouping of auto-created groups", select the option "New grouping" from the dropdown menu.

6. In the field "Grouping name", type in the new grouping name, for example "Assignment 1".
7. To finish, click on "Submit" at the bottom of the page.
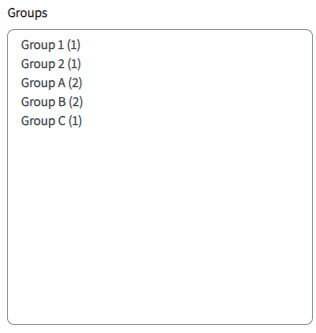
8. In the page that opens, you can see the randomly created groups.
In parentheses - the number of students in each group.
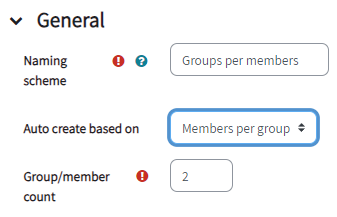
Random groups based on the number of participants in the group
1. In "Auto create based on", select the option "Members per group".
2. in the field "Group/member count", type in the number of students that will be in each group.
3. In "Select members with role", choose "Student".

4. In "Allocate members" choose "Randomly".
5. In the section "Grouping", in the field "Grouping of auto-created groups", select the option "New grouping" from the dropdown menu.
6. In the field "Grouping name", type the grouping name, for example "Assignment 1".
7. Click on "Submit" at the bottom of the page
8. In the page that opens, you can see the randomly created groups.
In parentheses - the number of students in each group.
Upload groups from Excel to course website
The course staff can create new groups on the course website by uploading all the groups at once, from an Excel file.
After uploading the groups to the course website, extended time can be set for each group as needed.
Preparing an Excel file with a list of students and groups
1. Create a new Excel file.
2. Create a column of ID numbers titled "idnumber" (type in lowercase letters). You can use the downloaded list of students as a basis. Click here for the guide to download a list of students.

3. Create a column of the names of the groups titled "group" (type in the first line in lowercase letters).

4. Make sure that each line shows an ID number as well as a group name.
5. The columns must be copied from Excel. This can be done by selecting all the cells in both columns and copying them (Ctrl+C).
Uploading the Excel file to the course website
1. Enter the course website.
2. Click on "More" in the main toolbar of the course. Choose "Groups" in the menu that will open.

3. On the screen that opens, click on "Enrolling participants - Paste from spreadsheet".

4. On the next screen paste (Ctrl+V) the columns in the Data box
5. In order to create the groups, click on "Enrolling participants to groups"

6. To finish, click on "Continue".


In the left box you can see all groups in the course
In the right box you can see a list of students in the selected group
If the group in the Excel file already existed on the course website, the students will be added to the existing group.
If the group did not exist - a new group will be created and the students listed in the Excel file will be added to it.
Other guides related to groups